
![]()
Cite-Builder.com User Guide
Version 3.2 (7th June 2026)
Download A4 PDF copy Download Letter PDF copy
Contents
Overview: Basic and Premium versions
Subscribing to Premium membership
Logging in to access the Premium version
Forgotten your Premium membership password?
Navigating the Templates hierarchy
Template Search (Premium feature)
Overview of Template Search feature
Personal Templates (Premium feature)
Managing your Personal Templates
Re-ordering your Personal Templates
Editing or renaming a Personal Template
Exporting Personal Templates to a file
Drag-and-drop Personal Template sorting and deletion
Editing or renaming a Favourite
Exporting Favourites to a file
Citation History (Premium feature)
Cite-Builder Terminology
"Template"
A collection of fields (where we prompt you for information) and definitions used to create citations for a particular type of source (and sometimes the specific repository where it has been located). The Templates are all created by Cite-Builder admins.
"Template Set"
A number of Templates and/or Template Sets grouped together – usually the sources have a common theme.
"Style"
The particular structure and appearance in which the citation is created, as defined by an academic body (e.g. University of Strathclyde, Harvard), a repository or an heavily-referenced citing guide (Evidence Explained).
"Format"
Variations of the citation to be used in different contexts: i.e. Bibliography, 1st footnote, subsequent footnotes.
"Personal Template"
These are user-created copies of "Templates", which the user has partially pre-filled with information in order to speed up subsequent citations for similar sources.
"Favourites"
These are user-stored lists of frequently-used field-values, specific to each fieldname, that can be used across multiple Templates or Personal Templates. For example, Surnames, Places or Church Names.
Overview: Basic and Premium versions
There are two versions of Cite-Builder: Basic and Premium.
- The Basic (free) version has all the core citation generating functionality, and a partial set of sources encoded into the system by the Cite-Builder admins.
- The Premium (subscription) version has all the core functionality and ALL of the
available sources, but also has some powerful additional features:
- Personal Templates
- Favourites
- Template Search
- Pins
Both versions are accessed from the main Cite-Builder.com home page (https://cite-builder.com) or via these direct links:
https://cite-builder.com/basic/
https://cite-builder.com/premium/
This guide covers both versions, but makes it clear where we are describing Premium features.
Joining the Mailing List
We recommend you join the mailing list in order to receive updates and potential future offers. We commit to not use this mailing list for any purpose other than Cite-Builder.com.
If you sign-up as a Premium member you can opt-in to our mailing list as part of the sign-up process.
As a Basic user, or if you initially opted-out of the list when you signed-up for Premium and now want to opt-in, you can join the mailing list by clicking the grey Subscribe to our mailing list button on the main Cite-Builder.com page and follow the onscreen instructions.

Subscribing to Premium membership
If you wish to sign-up for the annual Premium membership, simply click on the Subscribe button on the main Cite-Builder.com home page, or this link: https://cite-builder.com/register/premium/. Follow the onscreen instructions to complete your details to create your account and enter your payment details via the secure Stripe gateway. If you have a discount coupon, be sure to enter the details as you sign-up!
As part of the sign-up, you are asked to opt-in to our mailing list. We recommend you do so, in order to receive updates and potential future offers.
Logging in to access the Premium version
Once you are a Premium member, you will need to log in using the username and password you created when you sign-up. Click the Log In option in the main Cite-Builder banner at the top of the page.
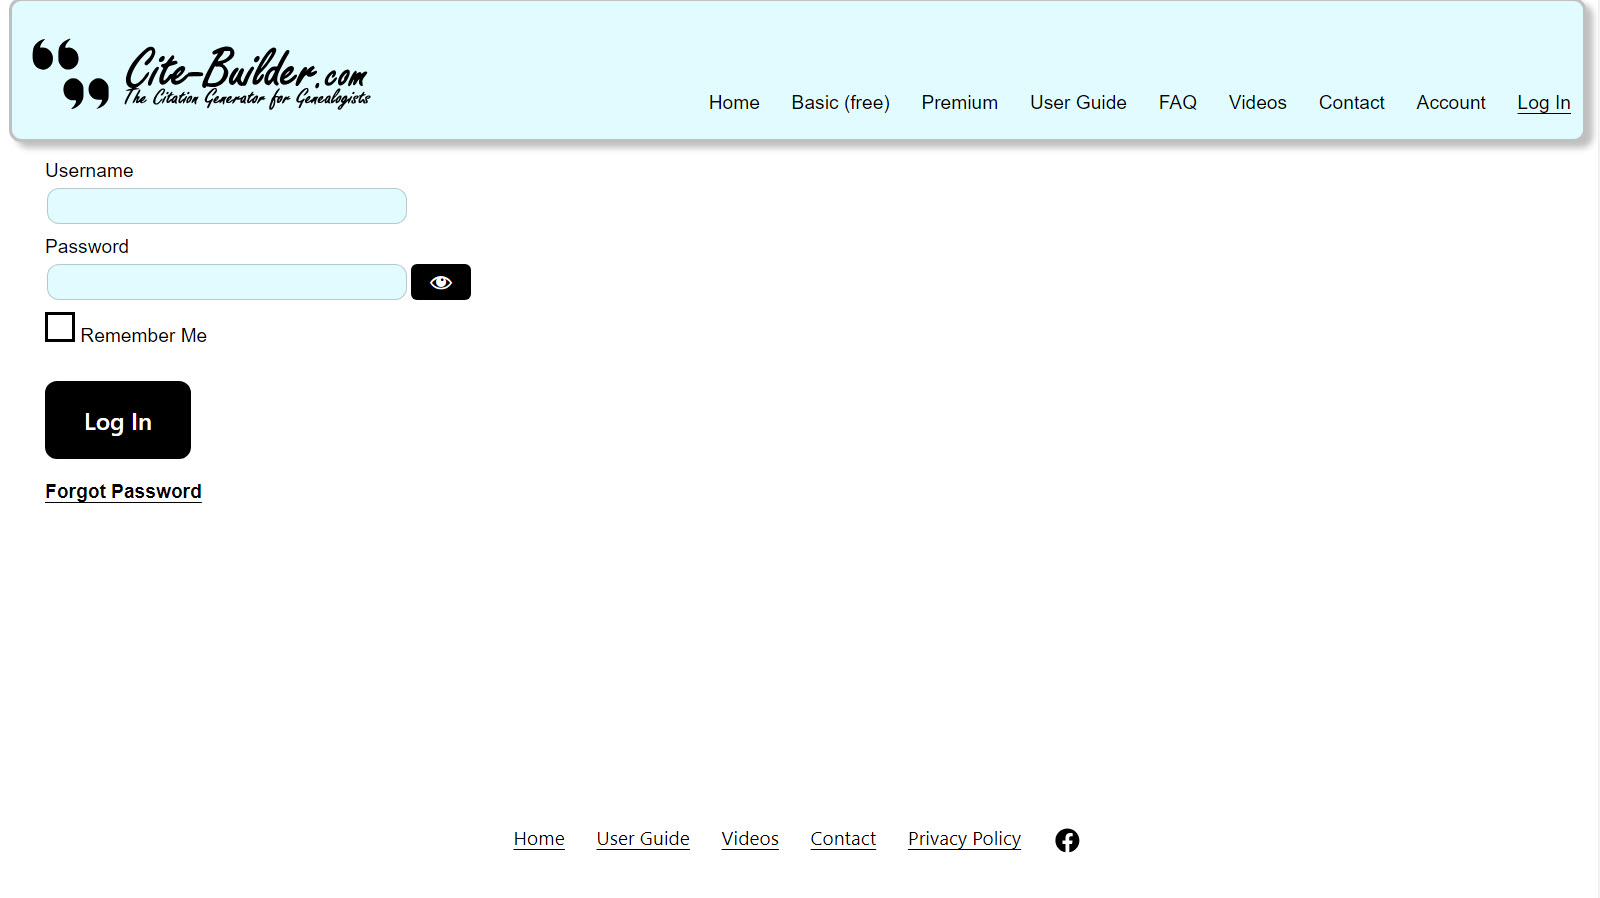
Forgotten your Premium membership password?
No problem. Click the Forgot Password link on the login screen and follow the onscreen instructions to reset.
Contact us
Have a problem, or a suggestion? Maybe a request for an additional Template or style, or to suggestion a change to an existing Template? You can contact us via email by clicking the Contact option in the top banner menu, or by emailing us direct to admin@cite-builder.com.
Note we are based in Sydney, Australia (UTC+10, +1 hour for daylight savings approx. October-April) so our response may be a little delayed. However, we will attempt to initially reply within 24 hours. Please note that it may take us longer to actually fulfill your request or answer your question, depending on the complexity and our workload.
Social Media
We’d love you to like and follow us on Facebook https://www.facebook.com/CiteBuilderDotCom/ and share with your fellow genealogists!
You can also join our Facebook Group called Cite-Builder Users.
Right, that’s all the boring stuff over with. Let’s get on to how to actually use Cite-Builder!
Navigating the Templates hierarchy
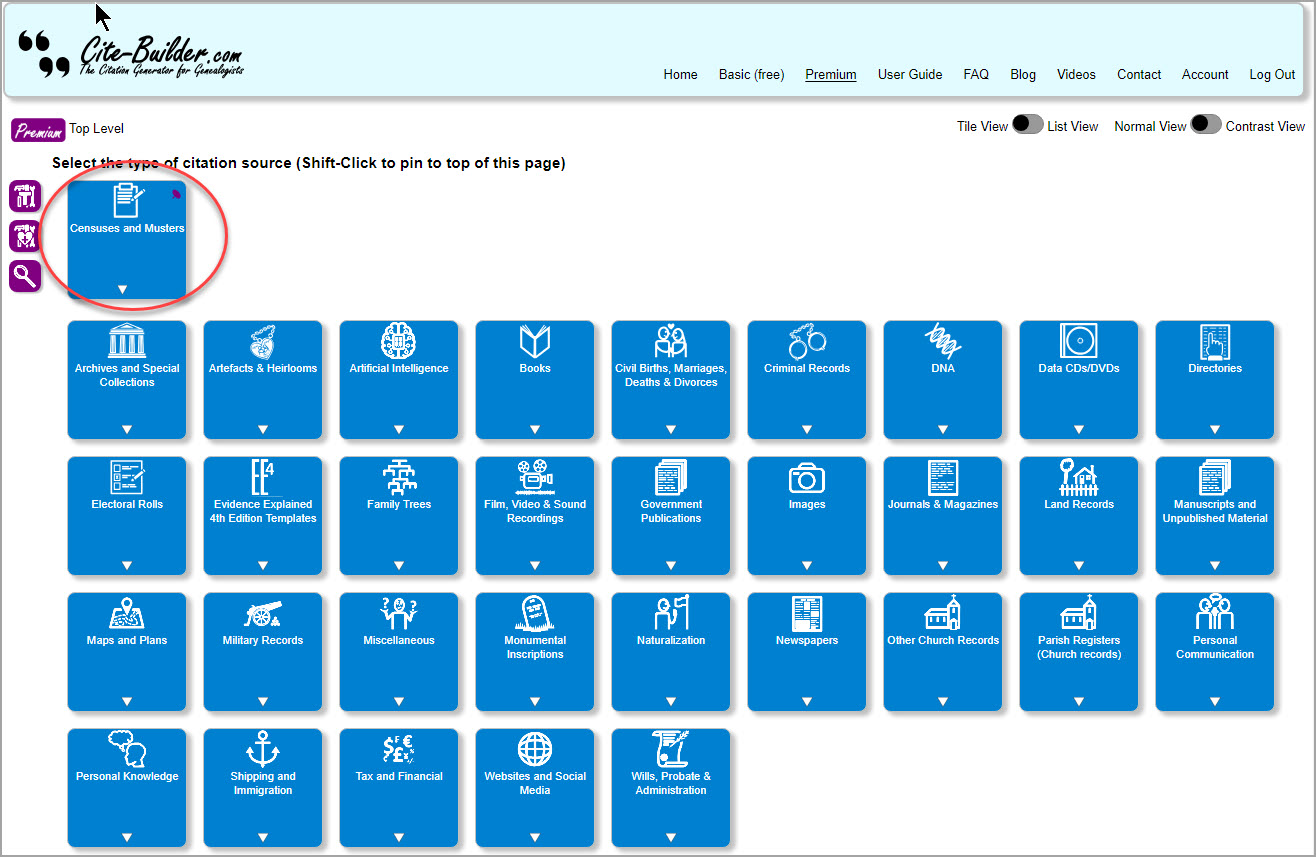
Cite-Builder citation sources are organised in a hierarchy of Templates and Template Groups. Template Groups are sets of Templates and/or other Template Groups.
From the top-level of the hierarchy, you can navigate down to the specific Template you want to use by clicking on the Template Group buttons to open and display the contents of that Template Group, until you see the Templates you want.
Template Groups are blue buttons, with a small white triangle or arrow-head at the bottom:

Templates look very similar, but have no arrow-head:

If a Template has padlock icon in a purple circle at the bottom, it is restricted to use by Premium subscribers only.

Personal Templates (Premium feature) are violet in colour and also have no arrow-head:

Note that there is no hierarchy to Personal Templates. All your Personal Templates are at the Top Level for easy access. Personal Templates are a Premium feature. See Personal Templates (Premium feature) for more details.
When you are browsing down through the hierarchy, you will see a breadcrumb trail below the main page banner. This shows you where in the hierarchy you are, and enables you to navigate back up to higher levels in the hierarchy by clicking on the underlined Template Group name, or Top Level :

If you are not at the Top Level, then you will also see a couple of grey navigation buttons below the Template Groups/Templates, and also smaller versions duplicated in a sidebar on the left-hand side of the screen for easier access. As their names suggest, these buttons take you back up one level or to the top level respectively.


If you are using the Premium version, then you also have the option of navigating to a Template by using the Template Search feature. See Template Search (Premium feature).
Important: Your Browser back button will NOT take you back up a level, as Cite-Builder is implemented as a single-page. Be careful not to click the back button unless you want to jump out of Cite-Builder!
Finally, again if you are using the Premium version, then you also have the option of "pinning" a Template or a Template Group to the top of the page on which it appears to make it easier to find when there are a lot of Templates or Template Groups on that page. See Pins (Premium feature).
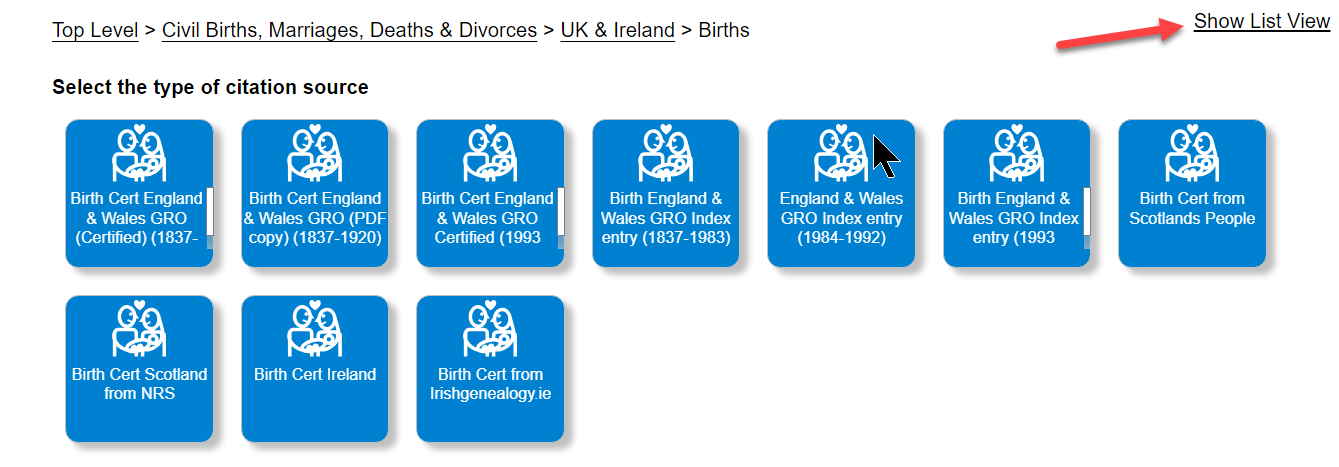
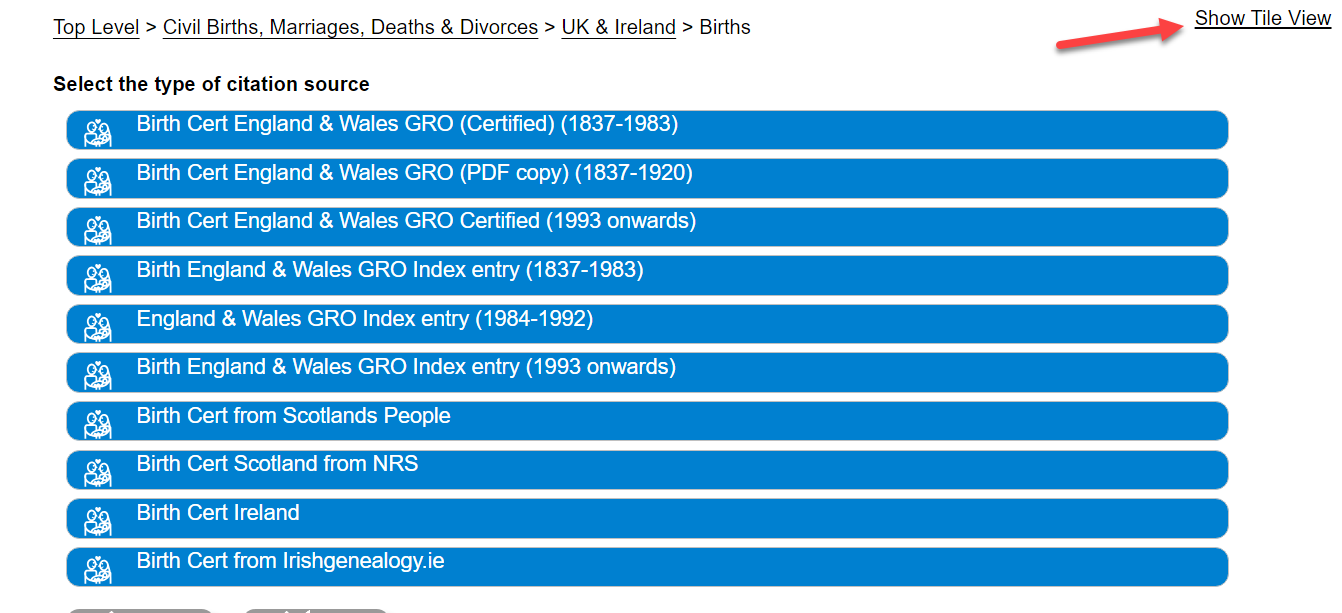
Display Options
List View
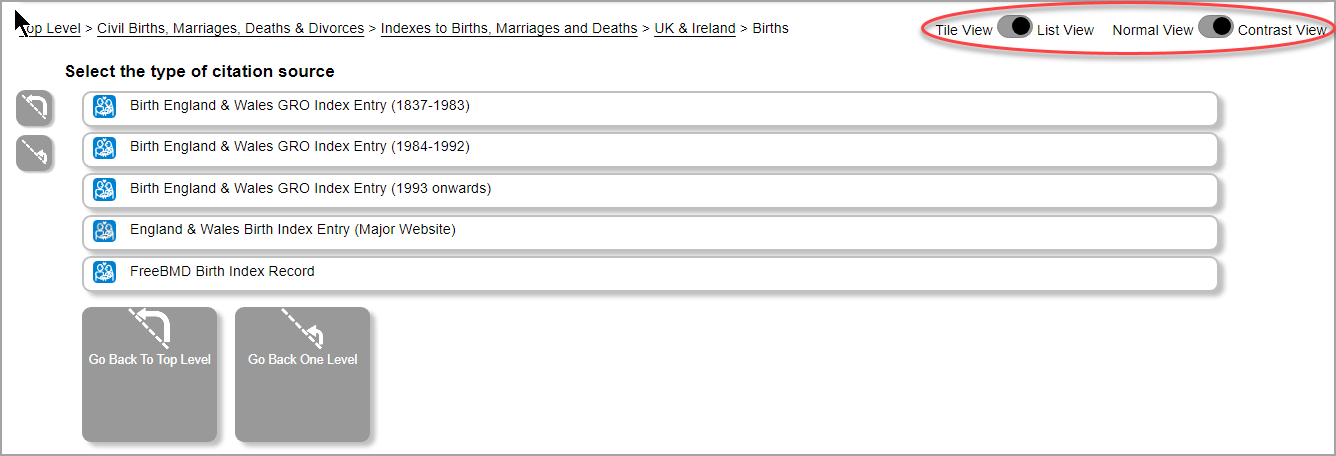
In addition to the default view that displays Templates, Template Groups and Personal Templates as buttons (which we call "Tile View"), there is also a "List View" available. This view is useful if you have customised your browser settings to use larger font sizes, which might make the text in the buttons harder to fit into the space we have alloted in the buttons. In these circumtances, a scroll bar is added to the button so you can scroll to see the full name of the Template, Template Group or Personal Template. But sometimes it will just be more convenient to switch to List View. In List View, where one Template, Personal Template or Template Group is displayed per line, and therefore there is more room to include the full text. You can toggle between Tile View and List View by clicking on the toggle switch in the top right of the page.
Contrast View
Another option when navigating Templates, Template Groups and Personal Templates is "Contrast View". This displays the Templates, Template Groups and Personal Templates without the coloured background and with black text. Some people may find this easier to read. You can toggle between Contrast View and Normal View by clicking on the toggle switch in the top right of the page.
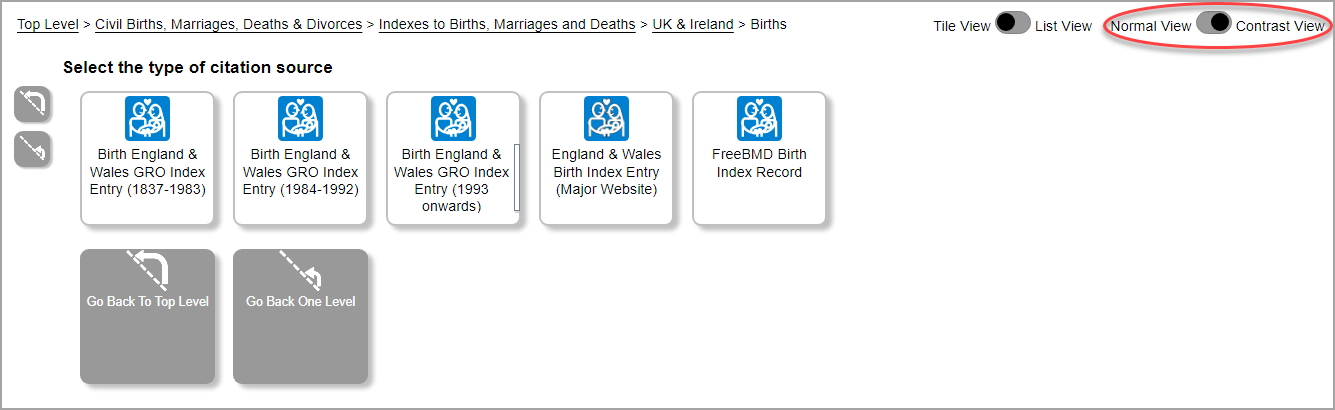
Note: You can combine Contrast and Tile Views.
Creating a citation
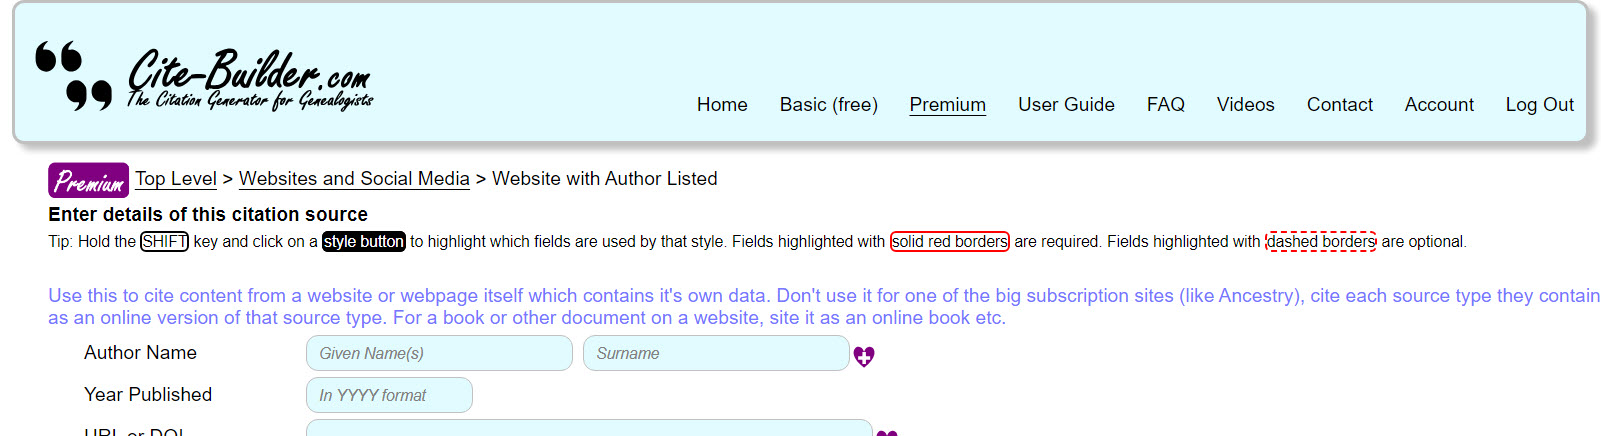
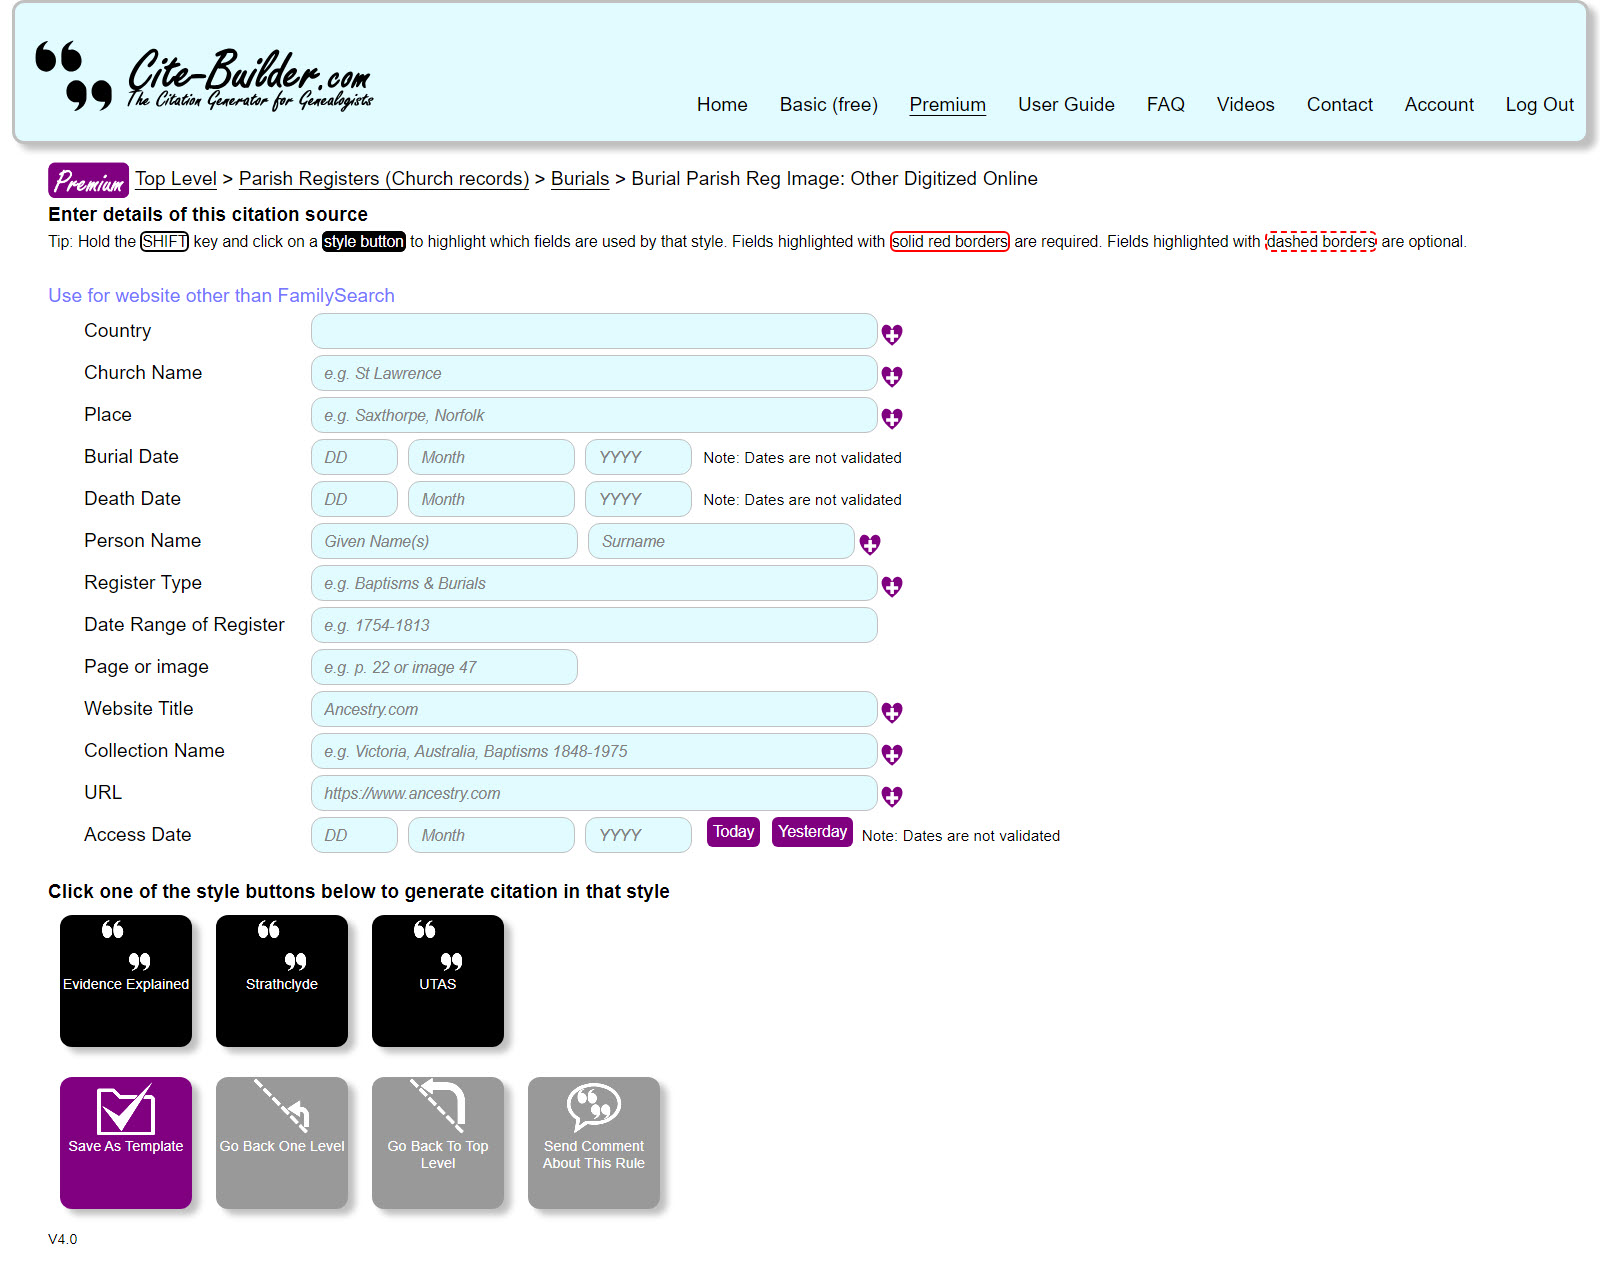
Once you have navigated to the Template you want to use (either by navigating down through the template hierarchy or using the Template Search (Premium feature)) you are presented with a page similar to the following:
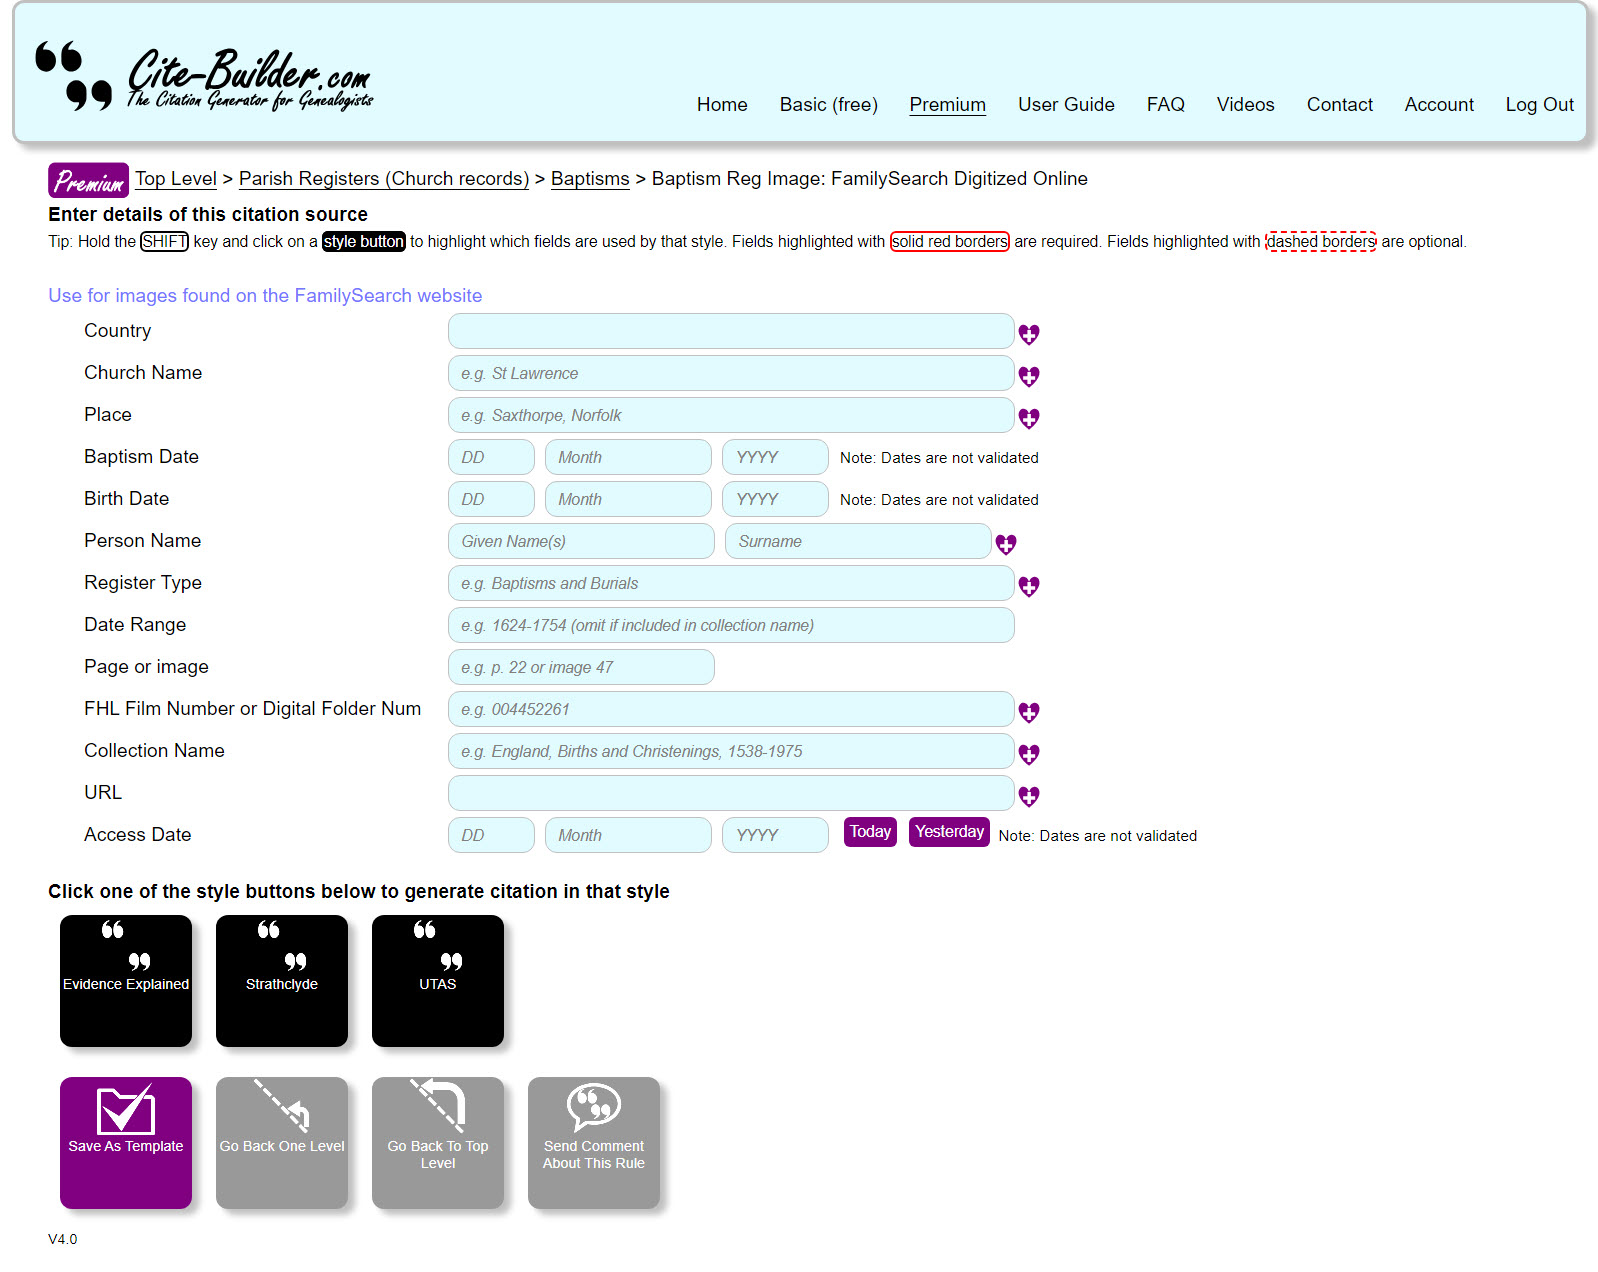
To create the citation:
- Click the tab to select the citation style you require. In this example, there are three styles availables ("Evidence Explained", "Strathclyde" and "UTAS") but this will vary by Template.
- Enter the information prompted for in the form. Note that fields with dashed red borders are optional, but all other fields are mandatory for the selected style.
- Click the black Build Citation button to generate the citation.
Depending on the source type and the citation style, you will be presented with the citation in one or more formats:
- 1st Footnote
- Subsequent footnotes
- Bibliography
Not all citation sources or styles have all of these formats defined as some may not be applicable, or defined by the style.

You can select and copy the citation text to your clipboard (for pasting into your document or database) by clicking the small grey copy button next to each format.

Some fields are optional for one or more of the available style or formats. If you do not complete these optional fields, the citation will be created without those optional parts.
However, if you do not complete a non-optional field, you will see a warning when the citation is created, and the missing value with be highlighted in the resulting citation:

If this happens, simply complete the missing field(s) and click the Build Citation button again.
When a Template has multiple citation styles defined for it (for example "Evidence Explained", "Strathclyde" and "UTAS"), you can click the tabs to switch between the styles and any information you have already input will be preserved. Also, if you have already created the citation in one style, and then switch to a different style, the citation will automatically be regenerated in the chosen style.
When the citation details form is displayed, some fields will have example values shown in them. For example:
These are simply guidelines to show you what sort of information is required in that field, and sometimes what format is expected. You will overwrite these values with your own.
Note: This is different to the Favourites feature available in the Premium version, which allows you to sort and recall values you frequently use. See Favourites (Premium feature) for details.
Some fields have additional help. Click on the help icon next to the field and the help will either be displayed in a pop-up, or a new browser tab or window will be opened directing you to another page (such as a Cite-Builder Blog article).

Additionally, some Templates have additional guidelines displayed above the fields:
In addition to using the Favourites feature, Premium users are also able to store partially completed Templates as their own Personal Templates for later re-use. See Personal Templates (Premium feature) for more details on this feature.
If you are a Premium user, you have a couple of convenient shortcut buttons available for any "Access Date" or "Accessed Date" fields that Templates may contain. As it is common that the access date is the current date, or possibly the day before, you have two buttons adjacent to an access date field to quickly enter today’s date or yesterday’s date.

Template Search (Premium feature)
Overview of Template Search feature
Recap: Cite-Builder citation sources are organised in a hierarchy of Templates and Template Groups. Template Groups are groups of Templates and/or other Template Groups. From the top-level of the hierarchy, you can navigate down to the specific Template you want to use by clicking on the Template Group buttons to open and display the contents of that Template Group, until you see the Template you want to use.
However, if you are a Premium user, you can also easily search the entire hierarchy for the Template(s) you want to use.
The Cite-Builder Search looks for the criteria you specify in the Template and the path (i.e., the Template Group names above the Template in the hierarchy), and additional keywords that the Cite-Builder admins have defined for certain Templates. This is the default behaviour, and you can modify it to perform a narrower search if needed. See Search fields and options.
Note: The Template Search feature only searches the standard templates. It does not search your Personal Templates.
Once you find the Template you need, you simply click on it to use it as you would if you had browsed down the hierarchy to find it.
To access the Search page, click the Template Search button at the bottom of most Premium pages, or in the left-hand sidebar of most Premium pages:


Search fields and options
The freshly-loaded Search page is shown below:
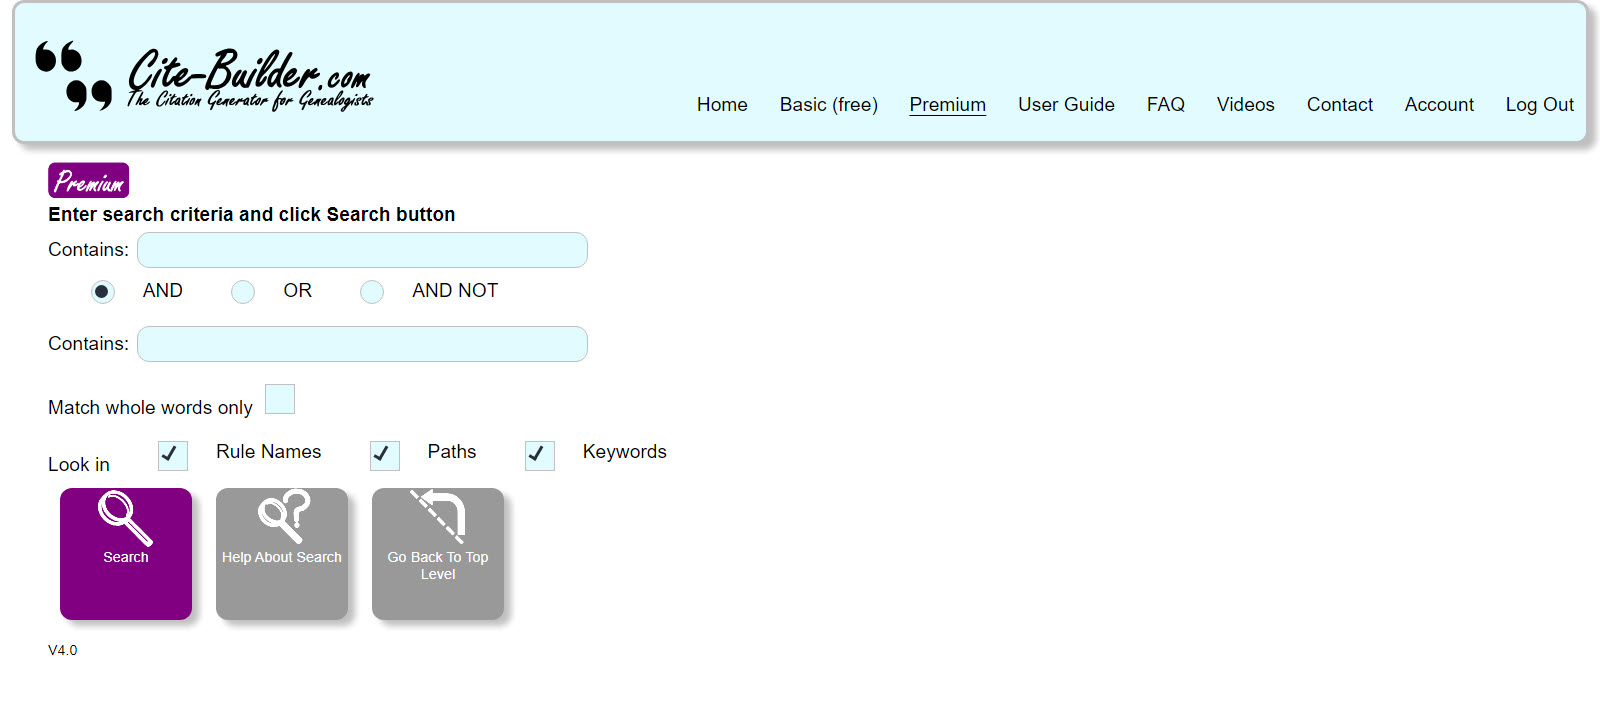
You can enter one or two search strings into the Contains: fields. These can each be a word, a phrase or even part of a word. By default, the Cite-Builder Search is going to look for matches containing these search strings in the Template Name, the Template Group Names in the path to the Template, or the Keywords. Note: There are no wildcard characters used in this search, although partial words can be specified as search strings.
You can specify how the two criteria are combined:
- AND – The search looks for Templates matching both criteria. Note: It may be that one string is found in the Template Name and the other string is found in the Path or the keywords.
- OR – The search looks for Templates matching one or both of the criteria.
- AND NOT – The search looks for matches that contain the first string, but not the second.
If you find you are getting back too many results, you can modify the way that the Search works:
- Tick the checkbox to indicate to only look for whole words.
- Untick any of Template Names, Paths or Keywords to remove these from the search scope.
You can also tick the Style Names checkbox to include Style names in your search.
When you have entered your search criteria and set the search scope options, click the Search button and the results will be displayed below, as shown in this example:
If you do not get back the results you need, simply change the criteria or scope and click Search again.
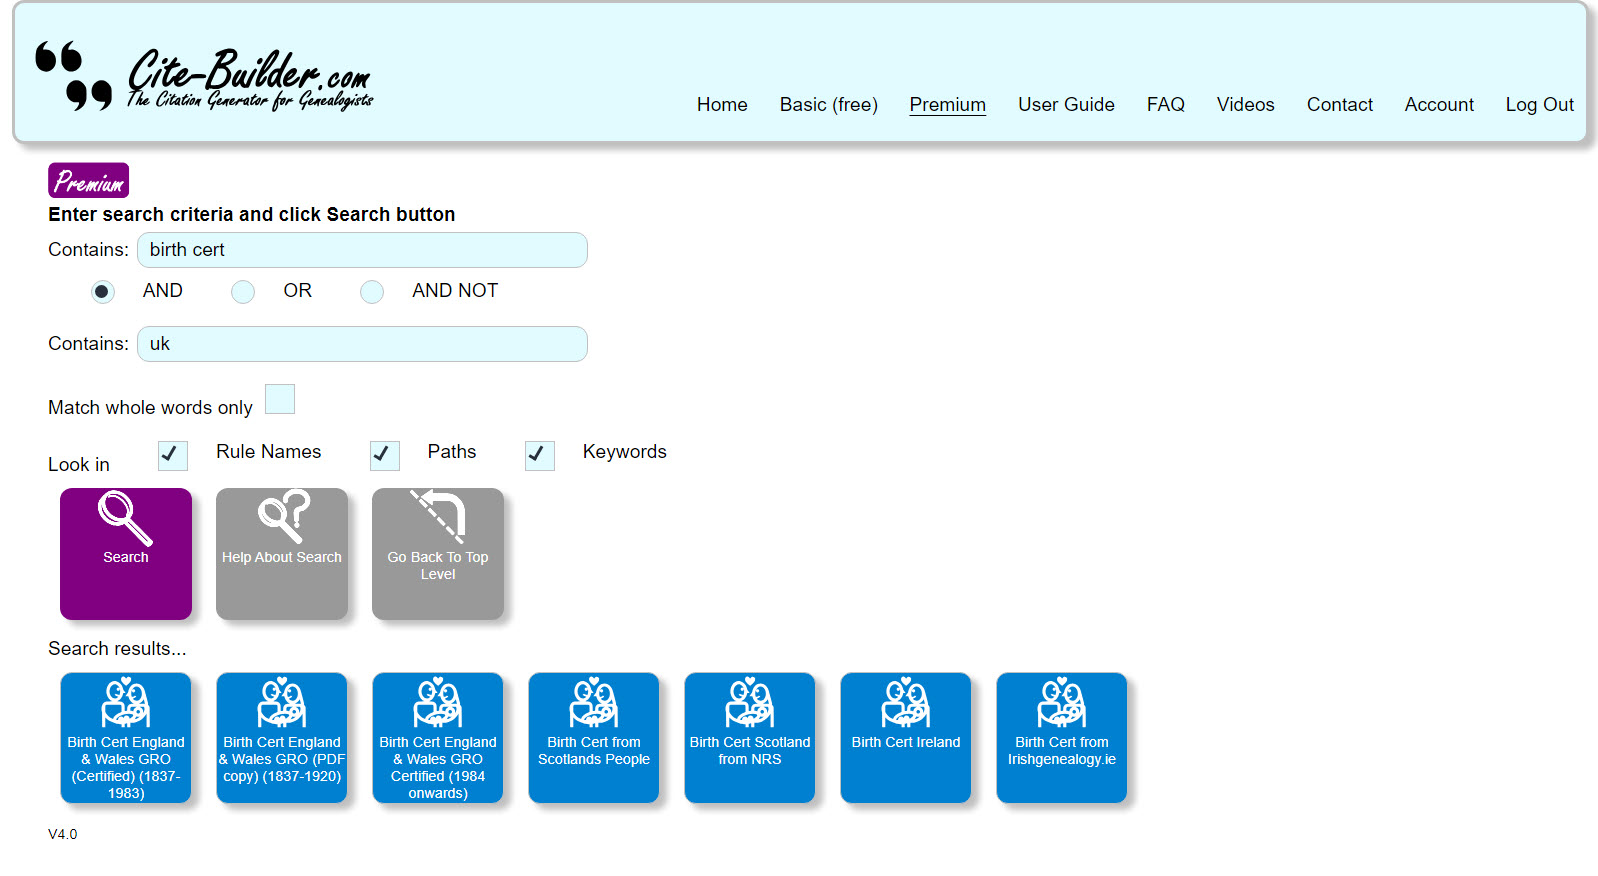
As a rule of thumb, start with the broadest search and then narrow it down if you find too many results. Let’s look at an example:
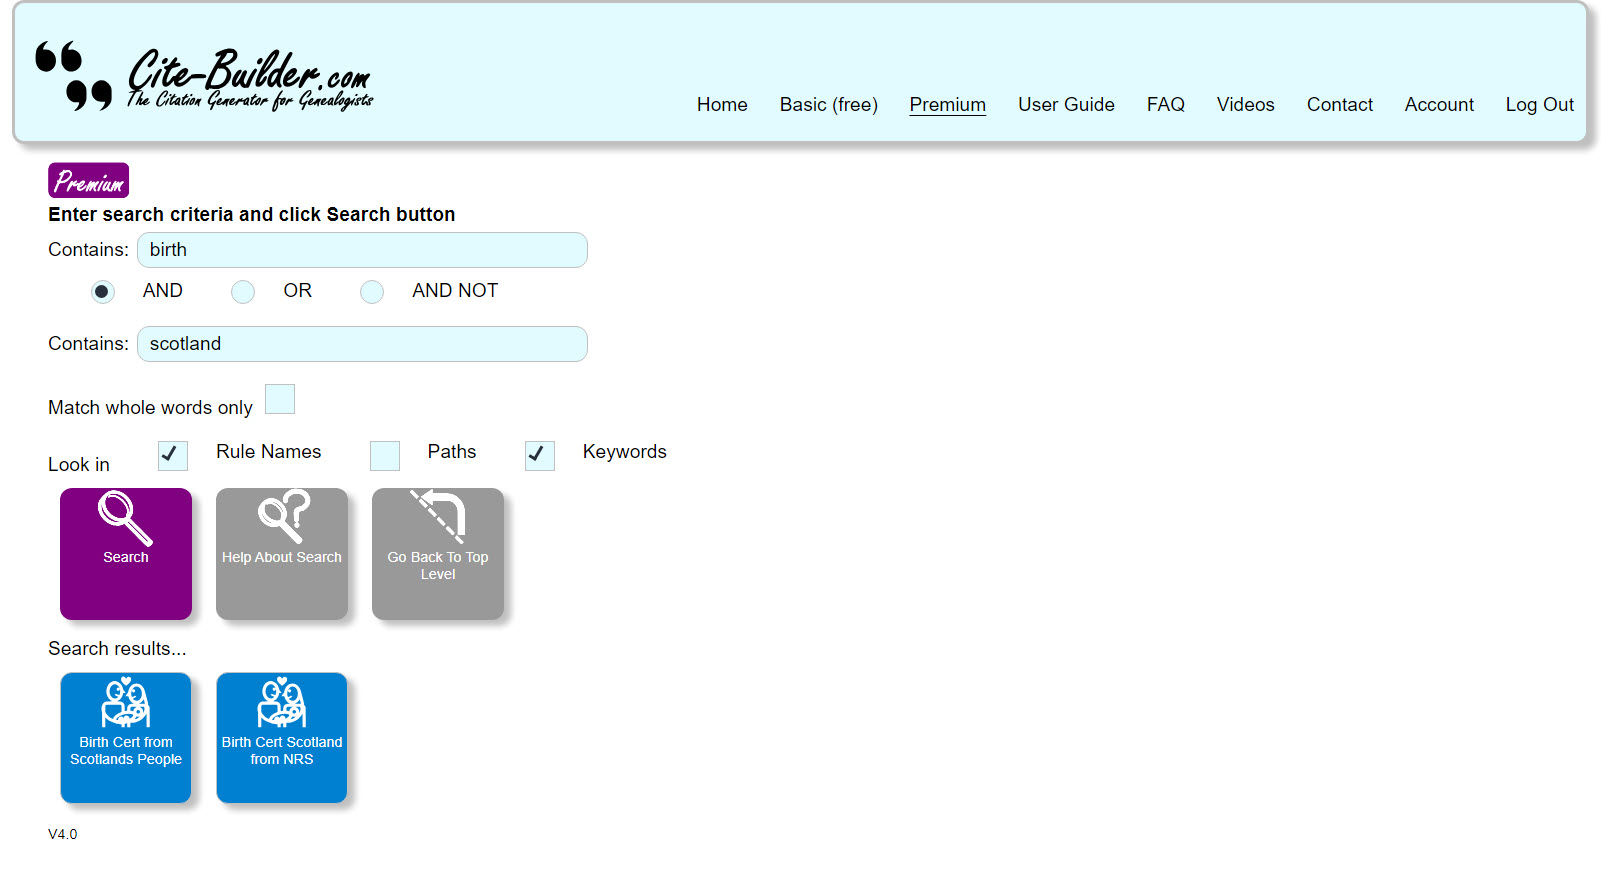
We enter two search strings, “birth” and “scotland”, and leave the “AND” combination radio button selected. We also leave the scope selections as default.
We click search and we get back six Templates:
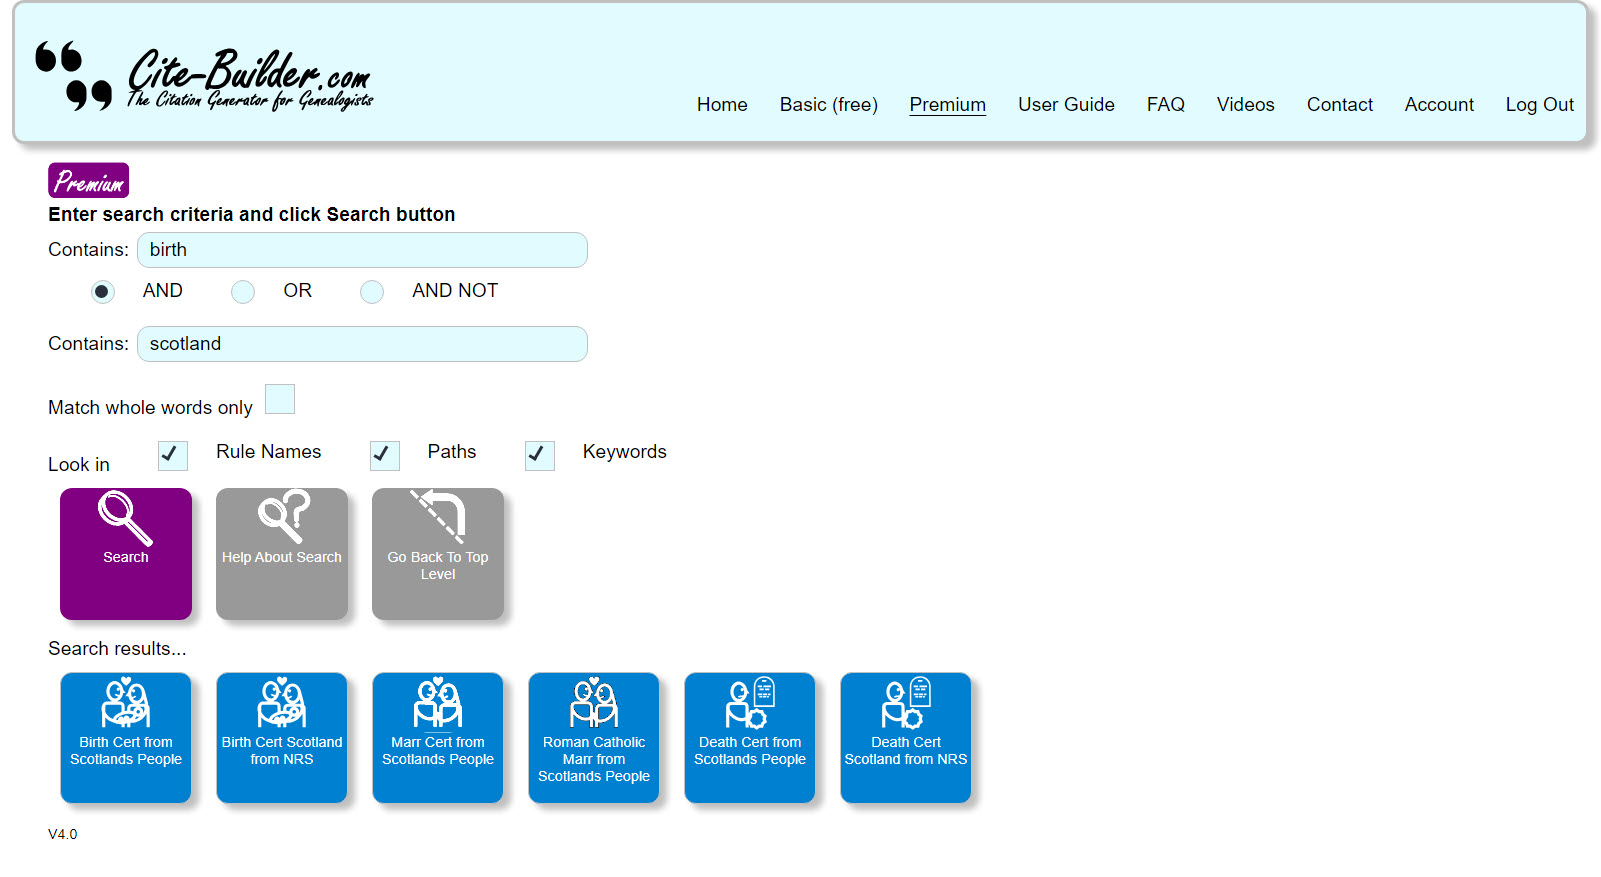
This isn’t many, and we can see two Templates relating to birth and Scotland so we’d probably just click the one we want to use. However, there are also Templates relating to Marriages and Death Certificates listed, and we might be curious as to why these appeared in our search, and how to narrow the search to leave them out?
If we hover our cursor over one of the Death Cert Templates, we can see that the Template Path contained the string Birth (as in Civil Births, Marriages & Deaths ) and that is what matched our first criteria.

If we uncheck Paths and click the Search button again, now we only get the results we were expecting:
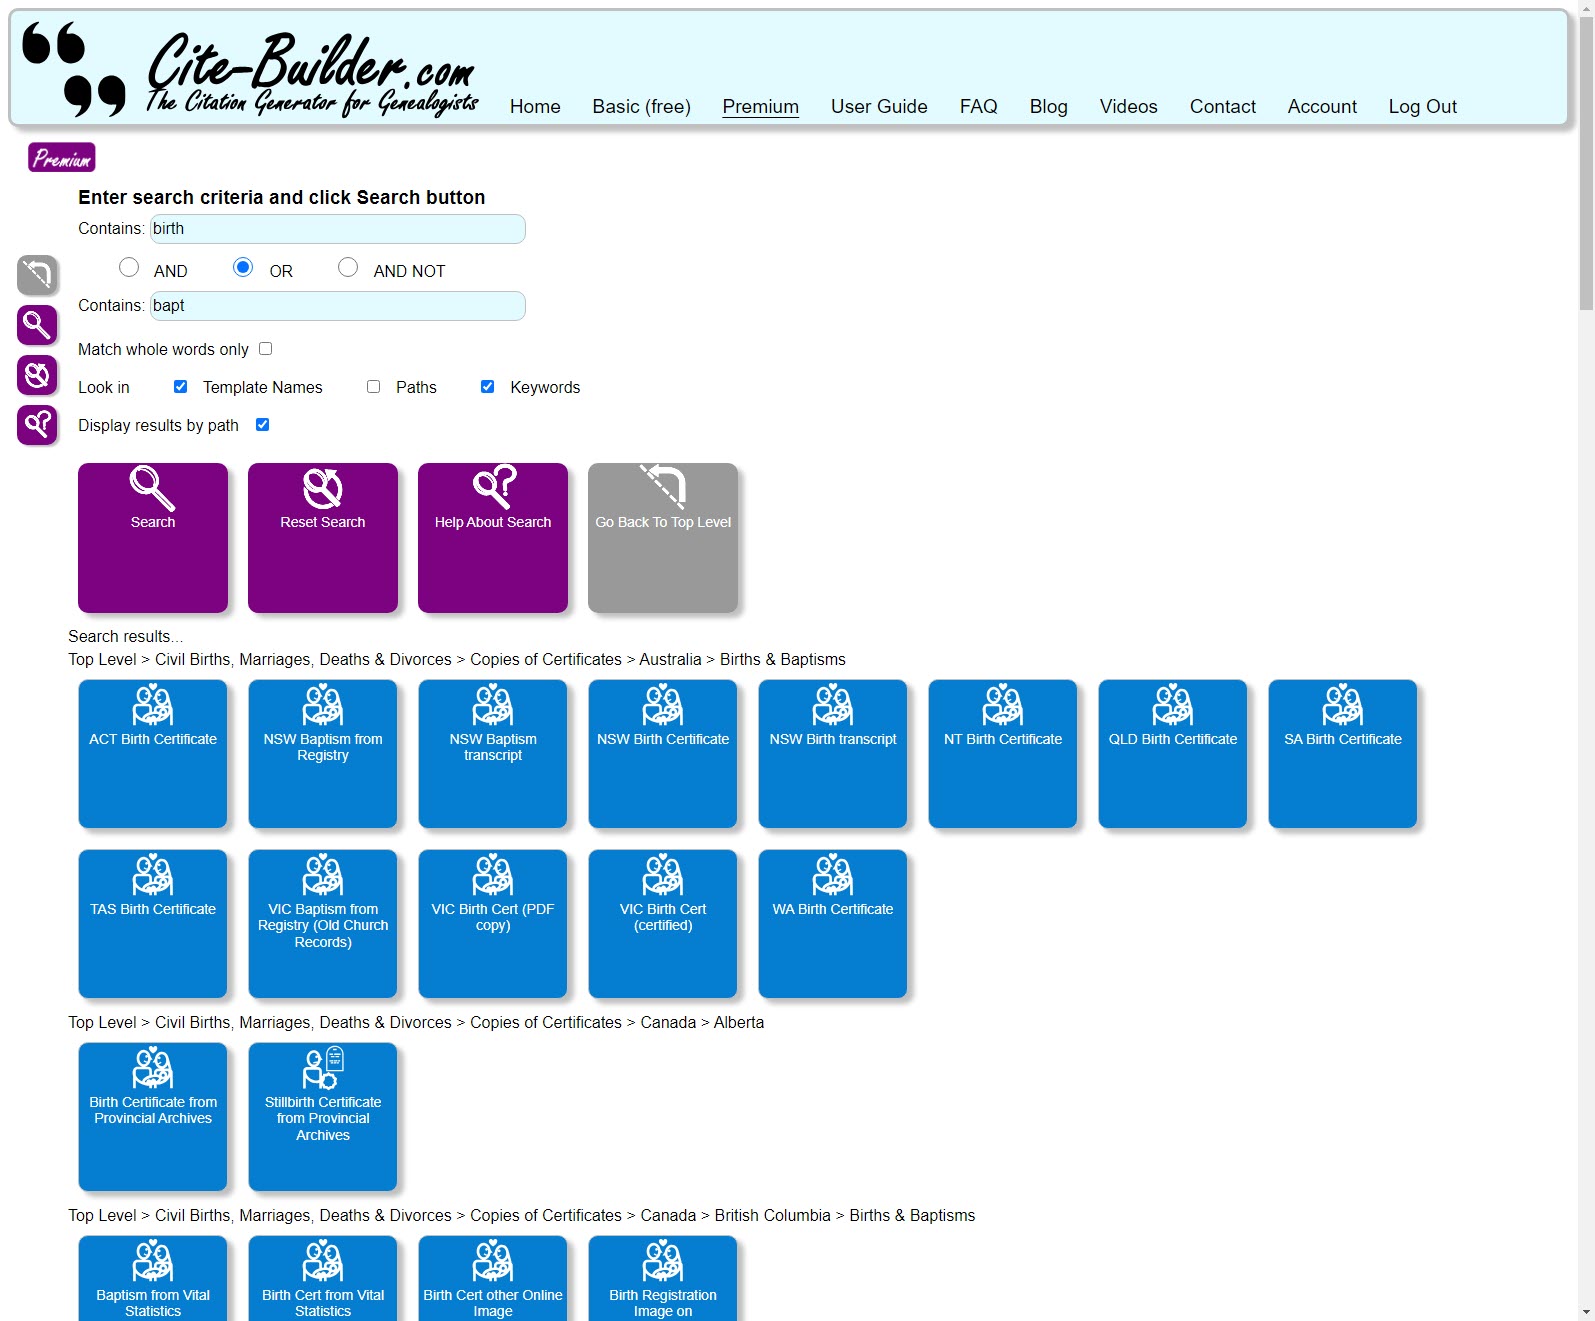
Sometimes you might get back a lot of search results, and it’s not clear from the names alone where the Template is applicable to. While you could hover your cursor over each Template to see the path and keywords as shown above, another way is to check the Display results by path checkbox and do the search again. This time, the results are returned divided by Template Group path as shown below.
You can also check the Display results by path checkbox before you click Search if you are expecting a large number of results.
When returning to the Search page, the criteria and options you previously used (in this session) are preserved, so you can modify and re-do your search if needed. However, if you want to set everything back to the starting defaults, simply click the Reset Search button.

Quick Search
Quick Search is a quick and convenient way to do a simple search for a Template. Quick Search appears near the top of the screen when you are browsing through the Template Set hierarchy.

You simply enter a search word or phrase (or partial word) into the Quick Search field and click the Search button.
Cite-Builder searches for that word, phrase or partial word in the Template Names, paths, and keywords in the section of database from where you are and lower. So, for example, if you are at the Top Level, it searches the whole database. If you have navigated down into the Civil Births, Marriages, Deaths & Divorces Template Set, then the search is restricted to just that Template Set and any Templates and nested Template Sets in contains, making it easy to focus your search. If your search returns any results then they will be displayed, enabling you to select and use a Template as normal.

To return to the Template Set where you were before doing the Quick Search, click the Exit Quick Search Results button in the lower toolbar or the sidebar.

If, from the Quick Search Results, you decide you need to use the full Template Search option instead, then click the Template Search button in the sidebar.
If you need help on using the QuickSearch, there is a Help button next to the Search button.

Personal Templates (Premium feature)
What are Personal Templates?
If you are a Premium user, you have the extra option to make copies of the predefined Templates with some of the information filled out, and save them as Personal Templates. For example, you might be citing the inscriptions from multiple headstones in a family plot at a particular municipal cemetery. You might create a copy of the appropriate Template, prefilled with the cemetery name, address and section, and save that as a Personal Template. Now you can use that Personal Template to create all the citations relating to those headstones, simply completing the different information per headstone each time.
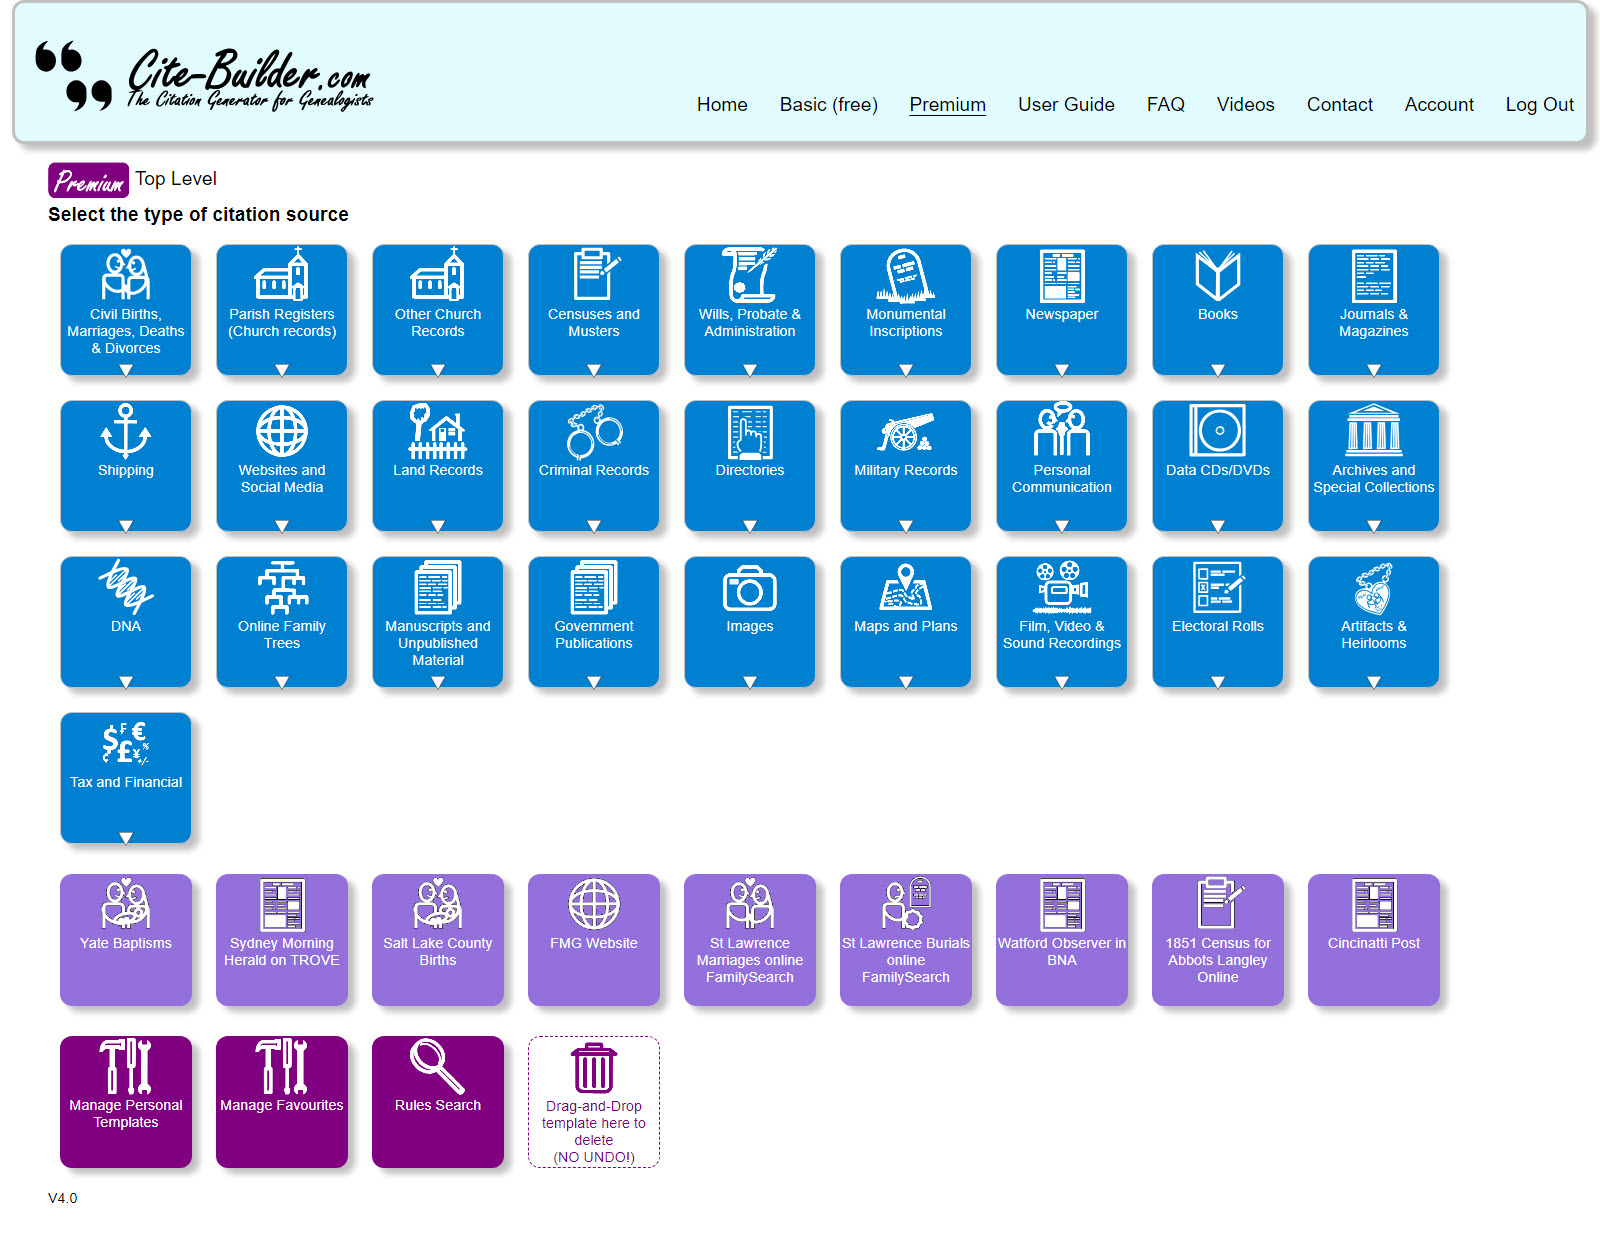
When you have Personal Templates, these appear at the Top Level of the Cite-Builder Templates hierarchy, and are show as violet buttons below the predefined Template Groups:
By default, your Personal Templates are listed in the order you created them but you can reorder them using Manage Personal Templates. See Managing your Personal Templates for more details.
If your Personal Templates are not visible, this may be because you have inadvertently gone to the Basic version of Cite-Builder. To remedy click on the Premium link in the menu bar to go to the Premium page (you may be prompted to login in to your Cite-Builder account).
Creating a Personal Template
To create a new Personal Template, first open the Template from which you want to create the Personal Template. Then complete as many of the fields as you need to store in the Personal Template. Note you can change these values when you use the Personal Template, and complete any other fields you have left blank in the Personal Template. When done, simply click the Save As Personal Template button.

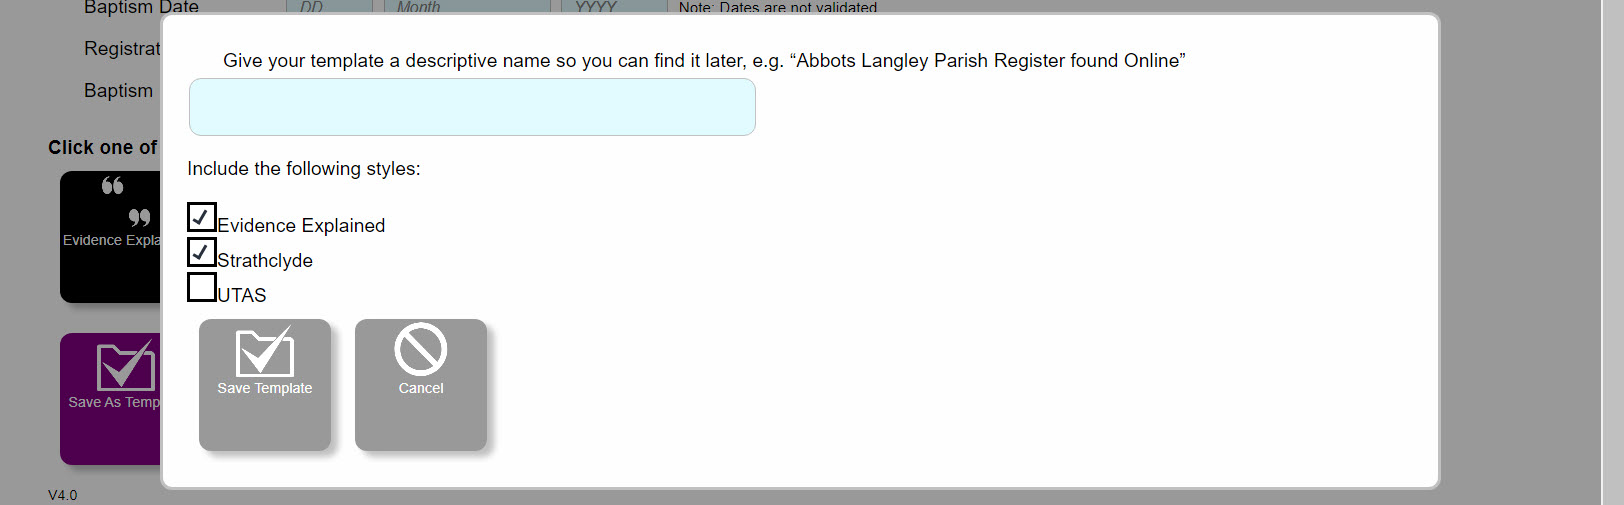
You will be prompted for a name with which to save the Personal Template. Use something that is meaningful to you so that you can easily select the Personal Template when you want to use it later. Note you can rename it later if you need too. See Editing or renaming a Personal Template.
Also note that if the original Template had multiple styles defined, all styles are saved in the Personal Template, but the one you currently have selected is saved as the default for when you use the Personal Template. You can change this by editing the Personal Template.
When you have saved the Personal Template, you are returned to the original Template where you can make additional changes to the fields and save as additional Personal Templates if needed.
When you return to the Cite-Builder Top Level you will see the new Personal Template(s) you have created displayed along with any other Personal Templates you already had.
Managing your Personal Templates
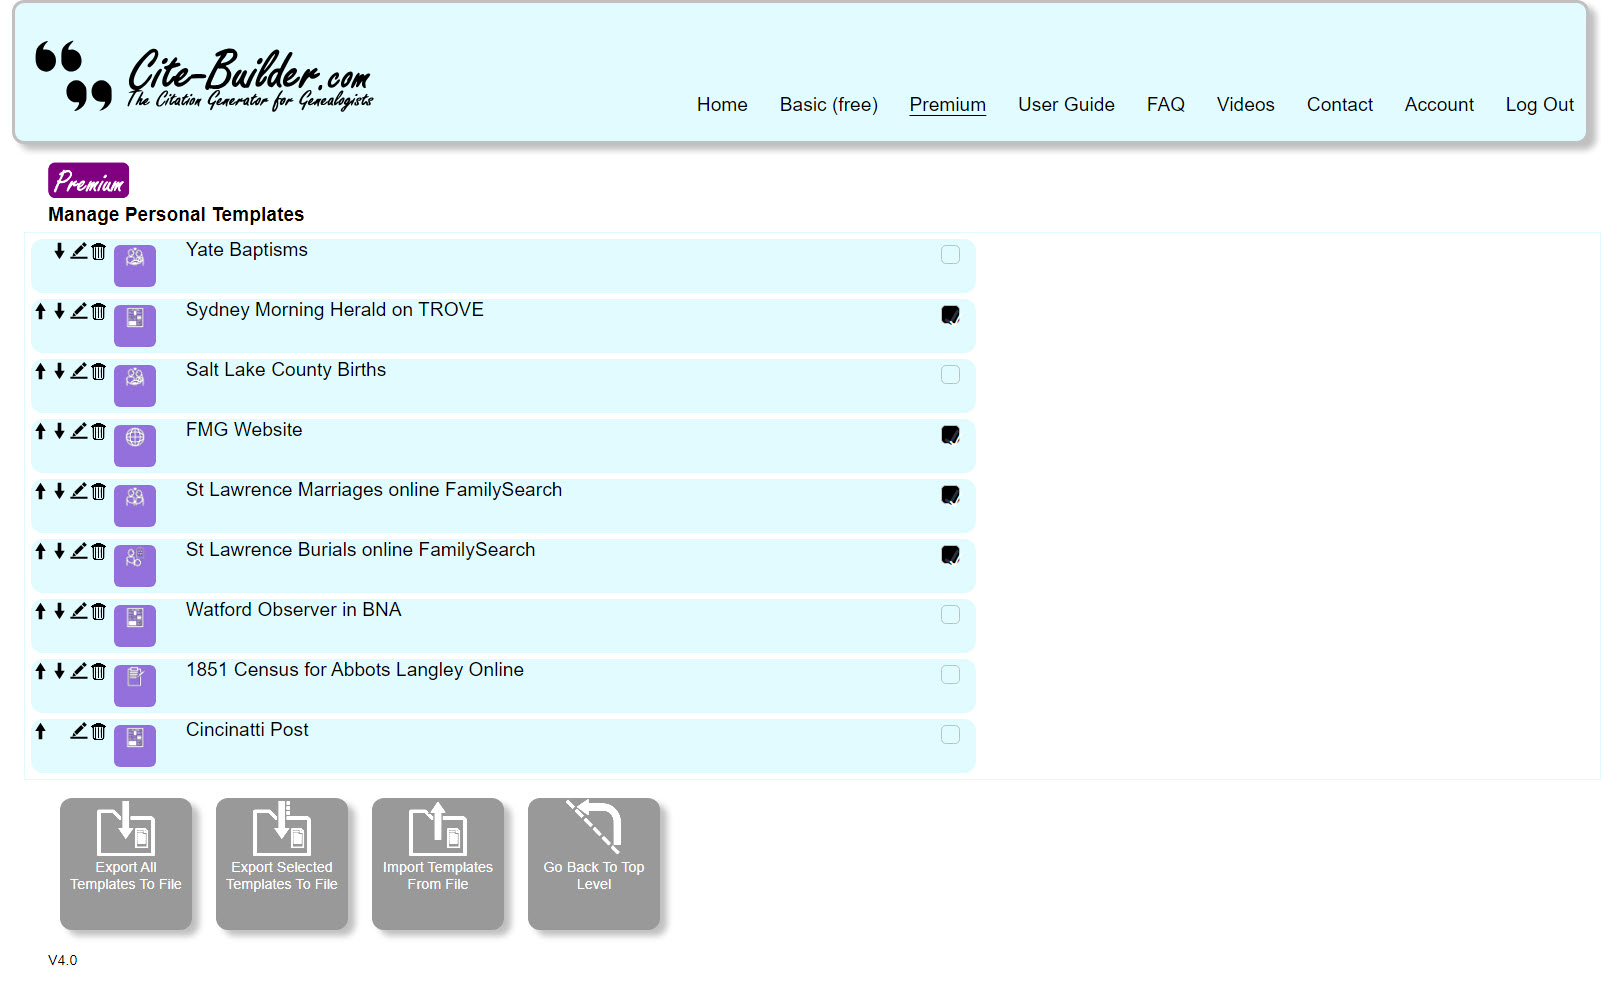
To manage Personal Templates, click the Manage Personal Templates button at the bottom of the screen, or in the left-hand sidebar.

This displays the Manage Personal Templates page, which shows a list of all your Personal Templates, with options you can perform on each one.
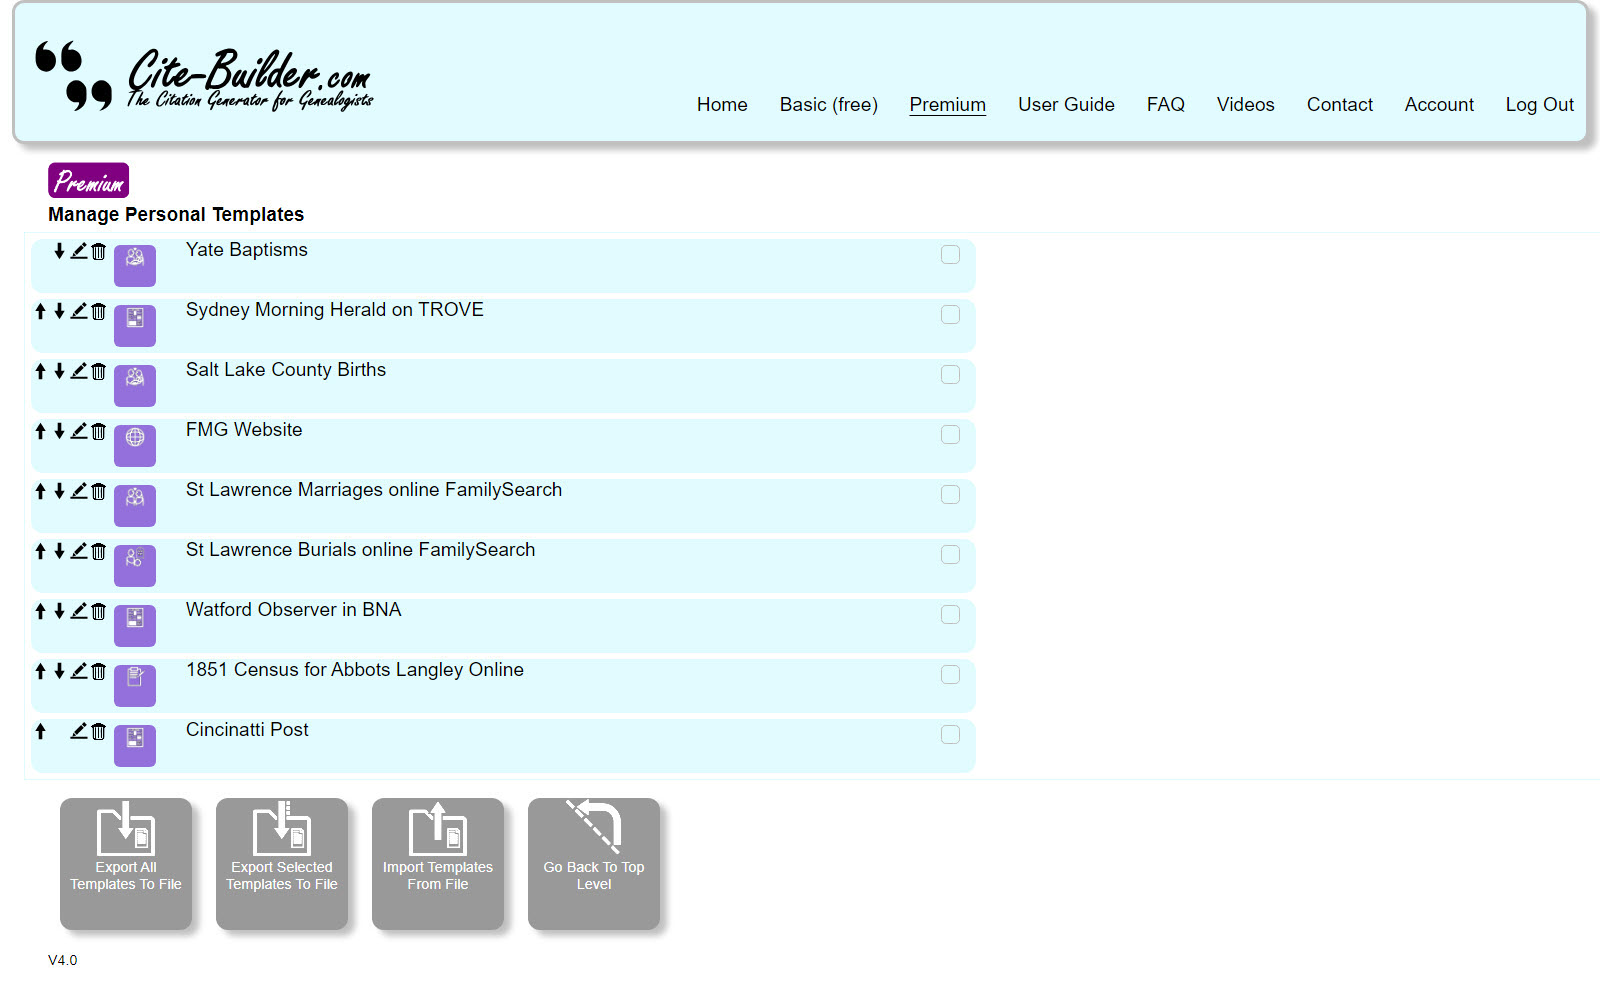
Important: Any changes you make from this are saved immediately. If you intend to do a lot of changes, we recommend that you first export your Personal Templates to a file as a backup in case you need to go back.
Re-ordering your Personal Templates
On the Manage Personal Templates page, your Personal Templates are listed top to bottom and this order will be displayed left to right on the Top-Level page, wrapping to additional rows if necessary. To change the order, click the Up and Down arrow icons
 next to each Personal Template listed on the Manage Personal Templates page.
Time-saving tip: To move a Personal Template straight to the top of the list, hold the SHIFT key as you click the Up-arrow icon. To move a Personal Template straight to the end of the list, hold the SHIFT key as you click the Down arrow icon.
Note: You can also drag-and-drop your Personal Templates to change their order on the main Premium page. See here.
Editing or renaming a Personal Template
To edit a Personal Template, including renaming it, click the Pen icon
![]() next to the Personal Template.
next to the Personal Template.
This will open up the Personal Template form, where you can make changes to the values stored in the fields, and change the Personal Template name if you wish. You can switch between the stored styles, and when you save the changes the currently selected style is saved as the default.
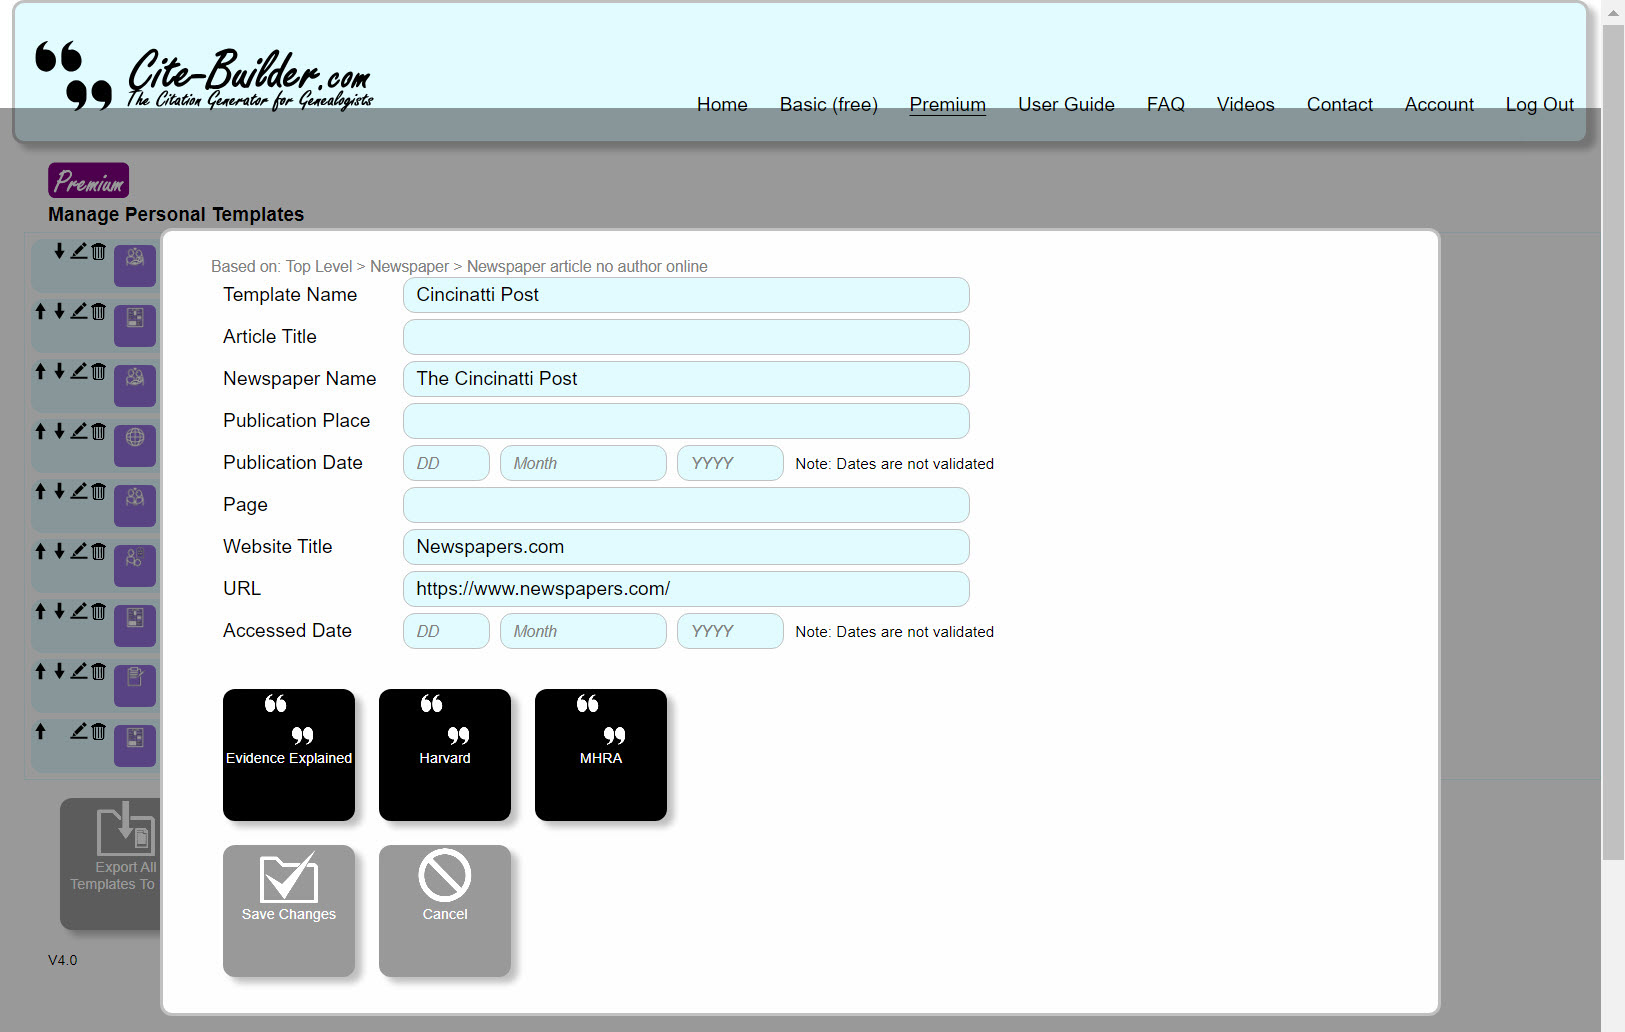
After making your changes, click the grey Save Changes button or, to abandon your changes, click the Cancel button.
Deleting a Personal Template
Over time you will likely build up a large number of Personal Templates and may want to have
a clear out! To delete an unwanted Personal Template, click the Bin icon
![]() next to it.
next to it.
This will display a prompt, asking you confirm to delete the Personal Template.

If you click the Delete button, the Personal Template is deleted. You cannot directly undo this, although you can restore the Personal Template by importing it from a backup copy of your Personal Templates that you have exported previously.
Time-saving tip: From the Manage Personal Templates page, you can delete a Personal Template with no additional prompting by hold the SHIFT key as you click the Bin icon. This is useful if you have a number of Personal Templates to delete, but be careful as there is no undo ! Ensure you have exported your Personal Templates as a backup before doing this.
Note: You can also drag-and-drop your Personal Templates to delete them on the main Premium page. See here.
Viewing a Personal Template
If you simply want to view the contents of the Personal Template from the Manage Personal Templates page, click the small violet Personal Template button next to the Personal Template. For example:

This actually opens up the edit form so you can actually make changes here, including renaming the Personal Template, if you wish. This is equivalent to clicking the Pen icon.
Exporting Personal Templates to a file
Your Personal Templates are stored in browser-specific storage on your device. Therefore, if you want to use them in a different browser and/or a different device, you need to export them from your original device and import them for use on the new browser or device. You may also want to share all or some of your Personal Templates with a fellow genealogist: in which case they would import the Personal Template file you created by exporting your Personal Templates. Finally, it’s always a good idea to frequently export your Personal Templates to a file and back that file up to a USB device or to the cloud.
To export all of your Personal Templates to a file, from the Manage Personal Templates page click the Export All Personal Templates To File button in the lower toolbar or the small version in the left-hand sidebar.

You will be asked to confirm the export, or to cancel.
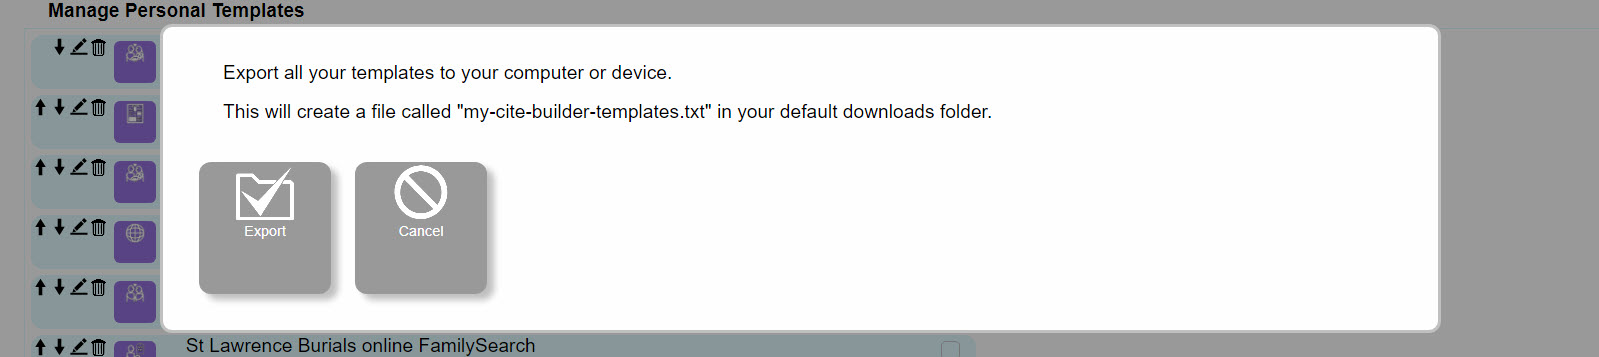
To confirm, click the Export button. The Personal Templates are exported to a file called my-cite-builder-templates.txt in your default downloads folder. If you already have a file with that name in that folder, then a version number is appended to the filename.
If you wish to export only selected Personal Templates to a file, then first select the Personal Templates to export by clicking the checkbox next to each Personal Template as shown in the example below:
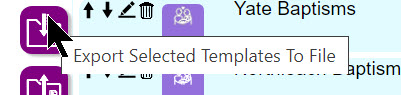
Next, click the Export Selected Personal Templates To File button in the lower toolbar in the small version in the left-hand sidebar.


Tip: The small buttons in the left-hand sidebar can be a little hard to distinguish. Hover your cursor over them to view a "pop-up" description of what they are.
You’ll be asked to confirm the export the selected Personal Templates, or to cancel.
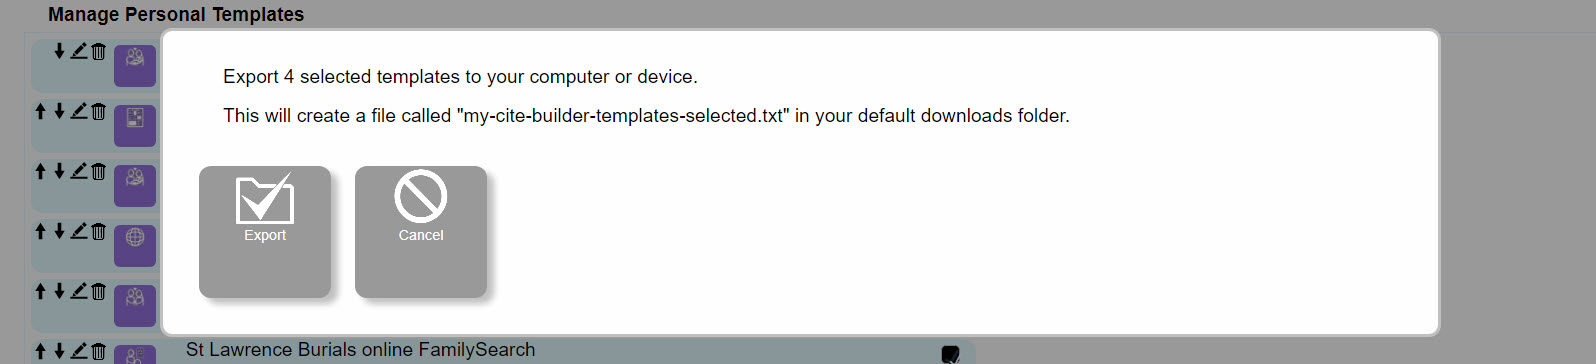
To confirm, click the Export button. The Personal Templates are exported to a file called my-cite-builder-templates-selected.txt in your default downloads folder. If you already have a file with that name in that folder, then a version number is appended to the filename.
Importing Personal Templates
To import Personal Templates, either from a backup you made by exporting, or from a Personal Template export file that someone shared with you, click the Import Personal Templates From File button on the Manage Personal Templates Page.

You will be prompted to select the file you want to import, or to cancel. Also, note there is a checkbox for you to tick if you want the import to completely overwrite your existing Personal Templates. If you leave this unchecked, the imported Personal Templates will be appended to your existing Personal Templates.
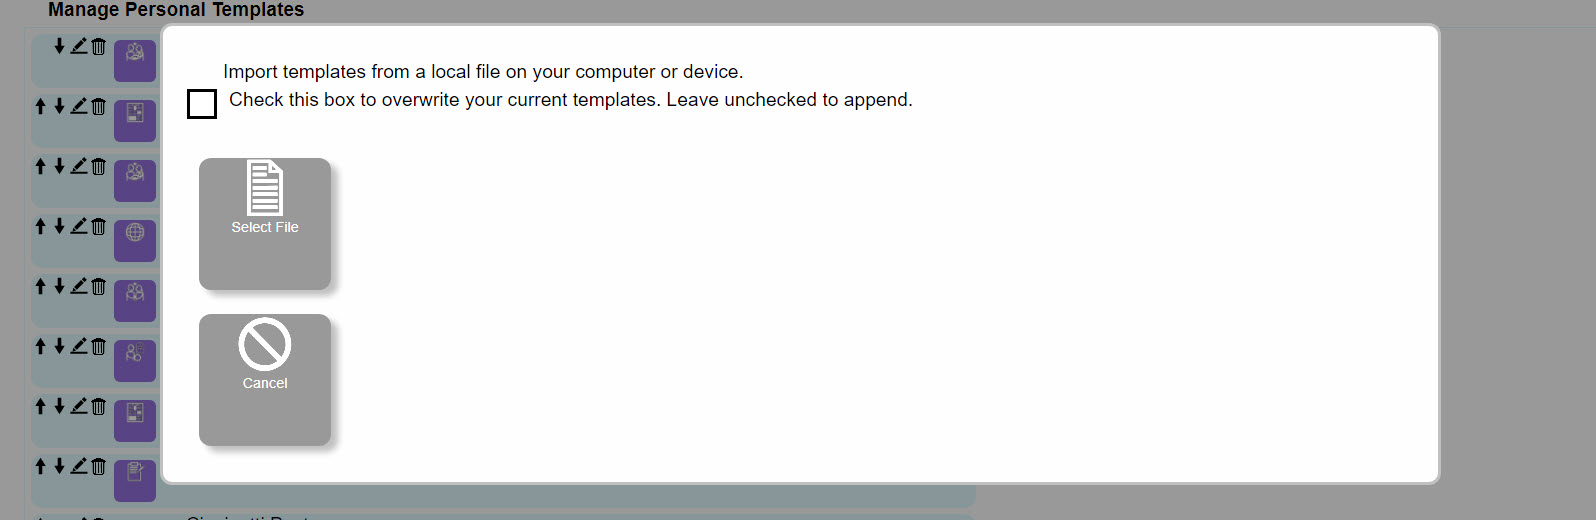
Click Select File and you will be prompted for the file that contains the Personal Templates you want to import.
Once you have selected a file, the Personal Templates it contains are imported.

The imported Personal Templates will appear at the end of your Personal Template list but you can reorder these as you need to. See Re-ordering your Personal Templates.
Note: There is no duplicate checking as part of the Personal Template import. If you find you have ended up with some duplicates you can simply delete the ones you don t need.
Important Note: The Personal Template export functions create very specific and complex format files. You’ll note that they are text files, and so it may be tempting to edit them with a program like Notepad (on Windows) or TextEdit (IOS). We would caution against this as the Import function is very picky when it comes to the contents and format of these files; importing a file that you have edited is likely to have unpredictable results!
Drag-and-Drop Personal Template Sorting & Deletion
You can use your cursor to drag-and-drop your Personal Templates on the main Premium screen to re-order them. When dragging a Personal Template, it’s best to "grab" the Personal Template in the lower-center of the tile. As you move your cursor across your other Personal Templates, you will see a faint dotted outline appear between them. These are the "dropzones" where you can move the Personal Template to. As you hover the cursor over one of these, it will open up wider for you to drop the Personal Template into. There is no additional prompting when moving Personal Templates as it’s easy enough to move them back if you make a mistake.
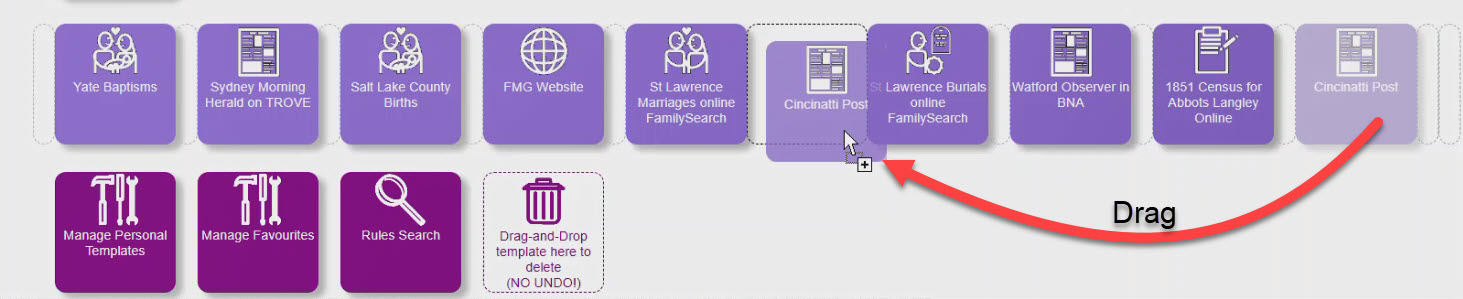
You can also drag a Personal Template onto the new "Delete" "dropzone" to delete it. By default, you are prompted to confirm deletion, but if you hold the SHIFT key while dropping the Personal Template onto the Delete dropzone, you can bypass this prompt. There is no "un-do" option. So, if you are going to delete or move and large number of Personal Templates, we would recommend your do an Export first as a backup.


Favourites (Premium feature)
What are Favourites?
If you are a Premium user, you have the extra option to store Favourites. These are values you enter frequently into certain fields when creating citations, and you can store them to recall later from a dropdown list on the field. Additionally, where fields use the same name in multiple Templates (including your Personal Templates), the Favourites for that field name are available across all of them.
For example, you might frequently enter the name Chipping Sodbury, Gloucestershire into the Location field across a number of different citation sources. You can save this as a Favourite for the Location field. It’ll save you time later, and save having to remember how to spell Gloucestershire correctly each time!
Favourites can be stored and recalled from standard citation Templates (defined by the Cite-Builder admins) and Personal Templates.
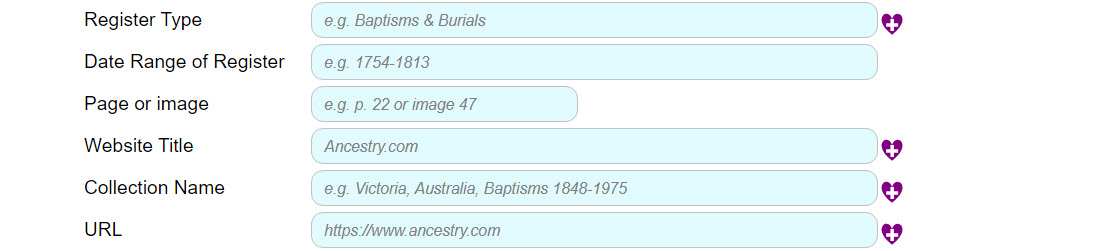
Not every field can have Favourites associated with it; for some fields it simply makes no sense. You can tell which fields can have Favourites stored because they have a purple heart icon
![]() next to them, as shown in the following example.
next to them, as shown in the following example.
Depending on which browser you are using, you may see a small dropdown arrow on the right-hand side of the field. It may be visible all the time, or only when you click on or hover the mouse over the field. If you click on this down-arrow, you should get the drop-down list of any Favourites you have stored for that field. On some browsers, there is no drop-down arrow and you need to double-click in the field to display the list of Favourites. The obvious clue that the field can have Favourites though is the presence of the purple heart Favourite icon.
Also, depending on whichever browser you are using, the field drop-down list may also include some values for that field that you have entered recently, as well as your stored Favourites. This is simply a function of the browser’s AutoComplete feature.
It’s also important to realise that the drop-down list of Favourites on a field is automatically filtered by whatever is already in that field. If the field is blank, then the full list of that field’s Favourites will be listed. If there is anything already in the field, then the Favourites list will only contain values that contain what is in the field already. This is best illustrated with an example:
Here we see that the Church Name field is blank, and so we have all of the Favourites for that field displayed in the drop-down:
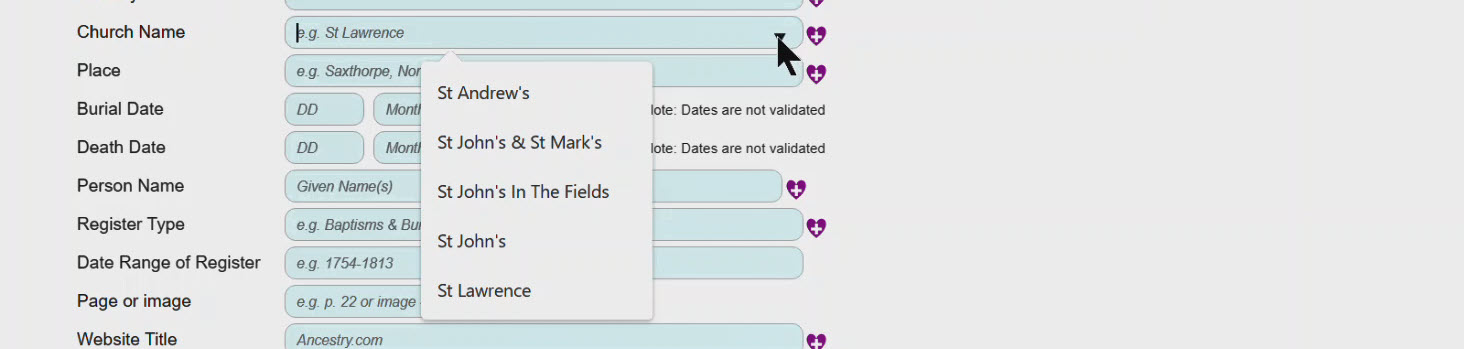
However, if we typed in “John” and then clicked the drop-down arrow, we only get a list of Favourites for that field that contain the word “John”:

This can be a very powerful way to quickly find the Favourite you want to use.
The Favourite icon also has the function of storing a new Favourite when you click on it – see Storing a Favourite.
NOTE: From 22nd December 2023, your Favourites will be automatically migrated and stored on the Cite-Builder server the first time you login to the Premium page. However, we still recommend that you export a copy to file from time to time – especially after you have created a large number or have done a lot of reordering or deletions. This enables you to recover your Favourites to a previous state should you need to.
If your Favourites are not visible, this may be because you have inadvertently gone to the Basic version of Cite-Builder. To remedy click on the Premium link in the menu bar to go to the Premium page (you may be prompted to login in to your Cite-Builder account).
Storing a Favourite
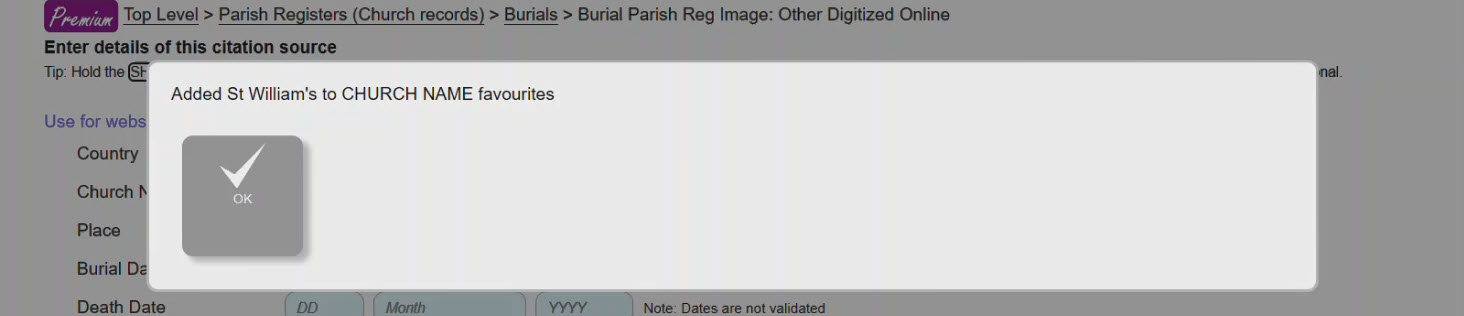
To store a Favourite, from either a standard citation Template or a Personal Template, enter the value you want to store in the field, and click the Favourite icon
![]() next to it. You will see a confirmation message that the Favourite has been stored and you then need to click OK to continue.
next to it. You will see a confirmation message that the Favourite has been stored and you then need to click OK to continue.
Time Saving Tip: Hold SHIFT when you click the Favourite icon and the Favourites is stored with no confirmation message.
Managing your Favourites
To manage Favourites, click the Manage Favourites button displayed in the lower toolbar, or in the left-hand sidebar.


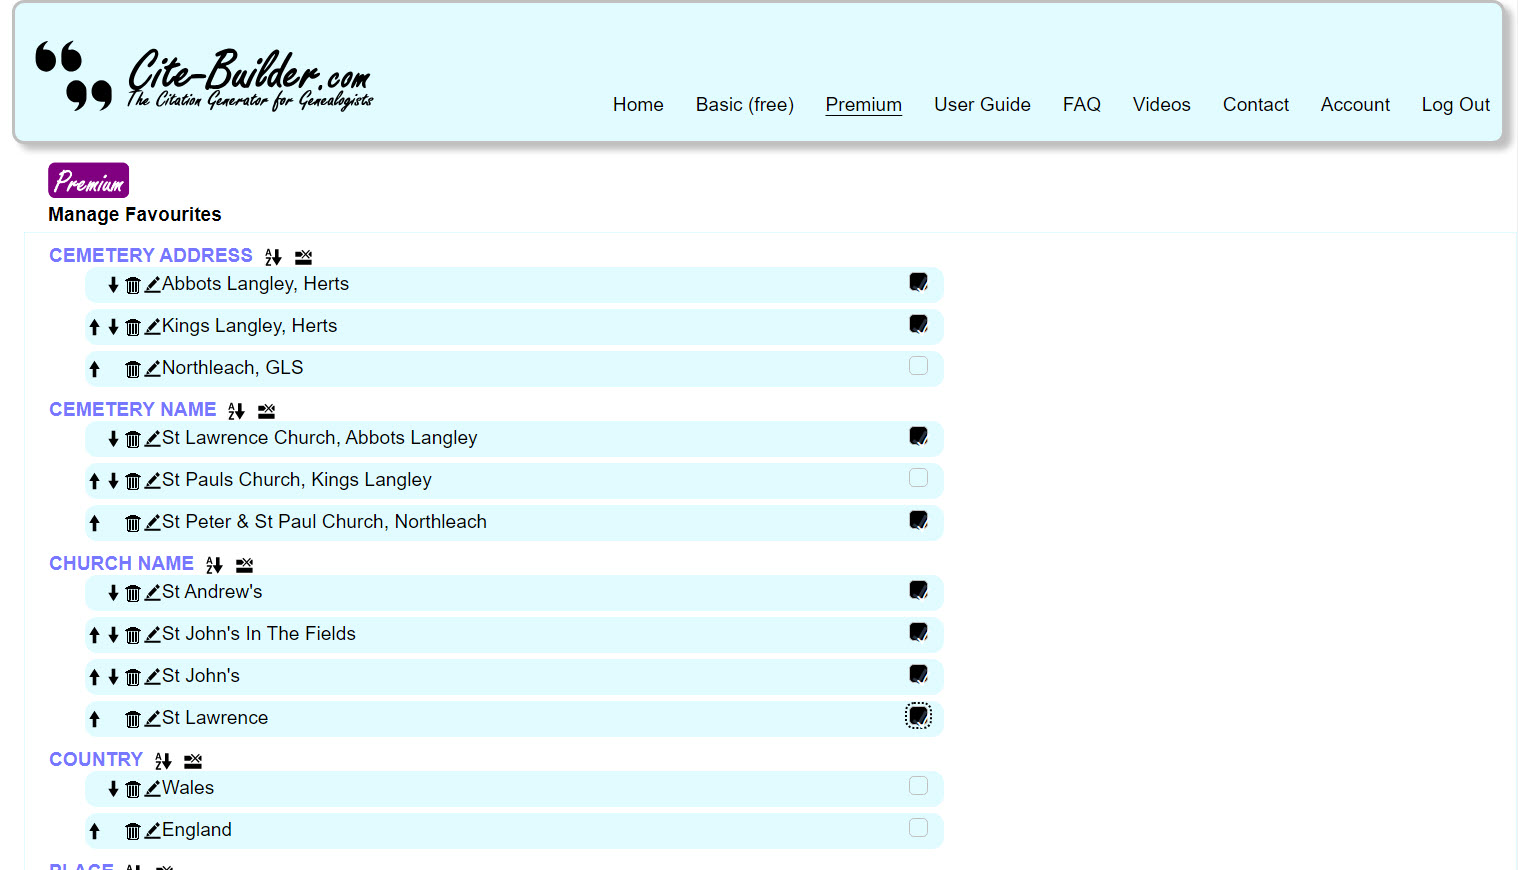
This displays the Manage Favourites page, which shows a list of all your Favourites listed by field, with options you can perform on each one. For example:
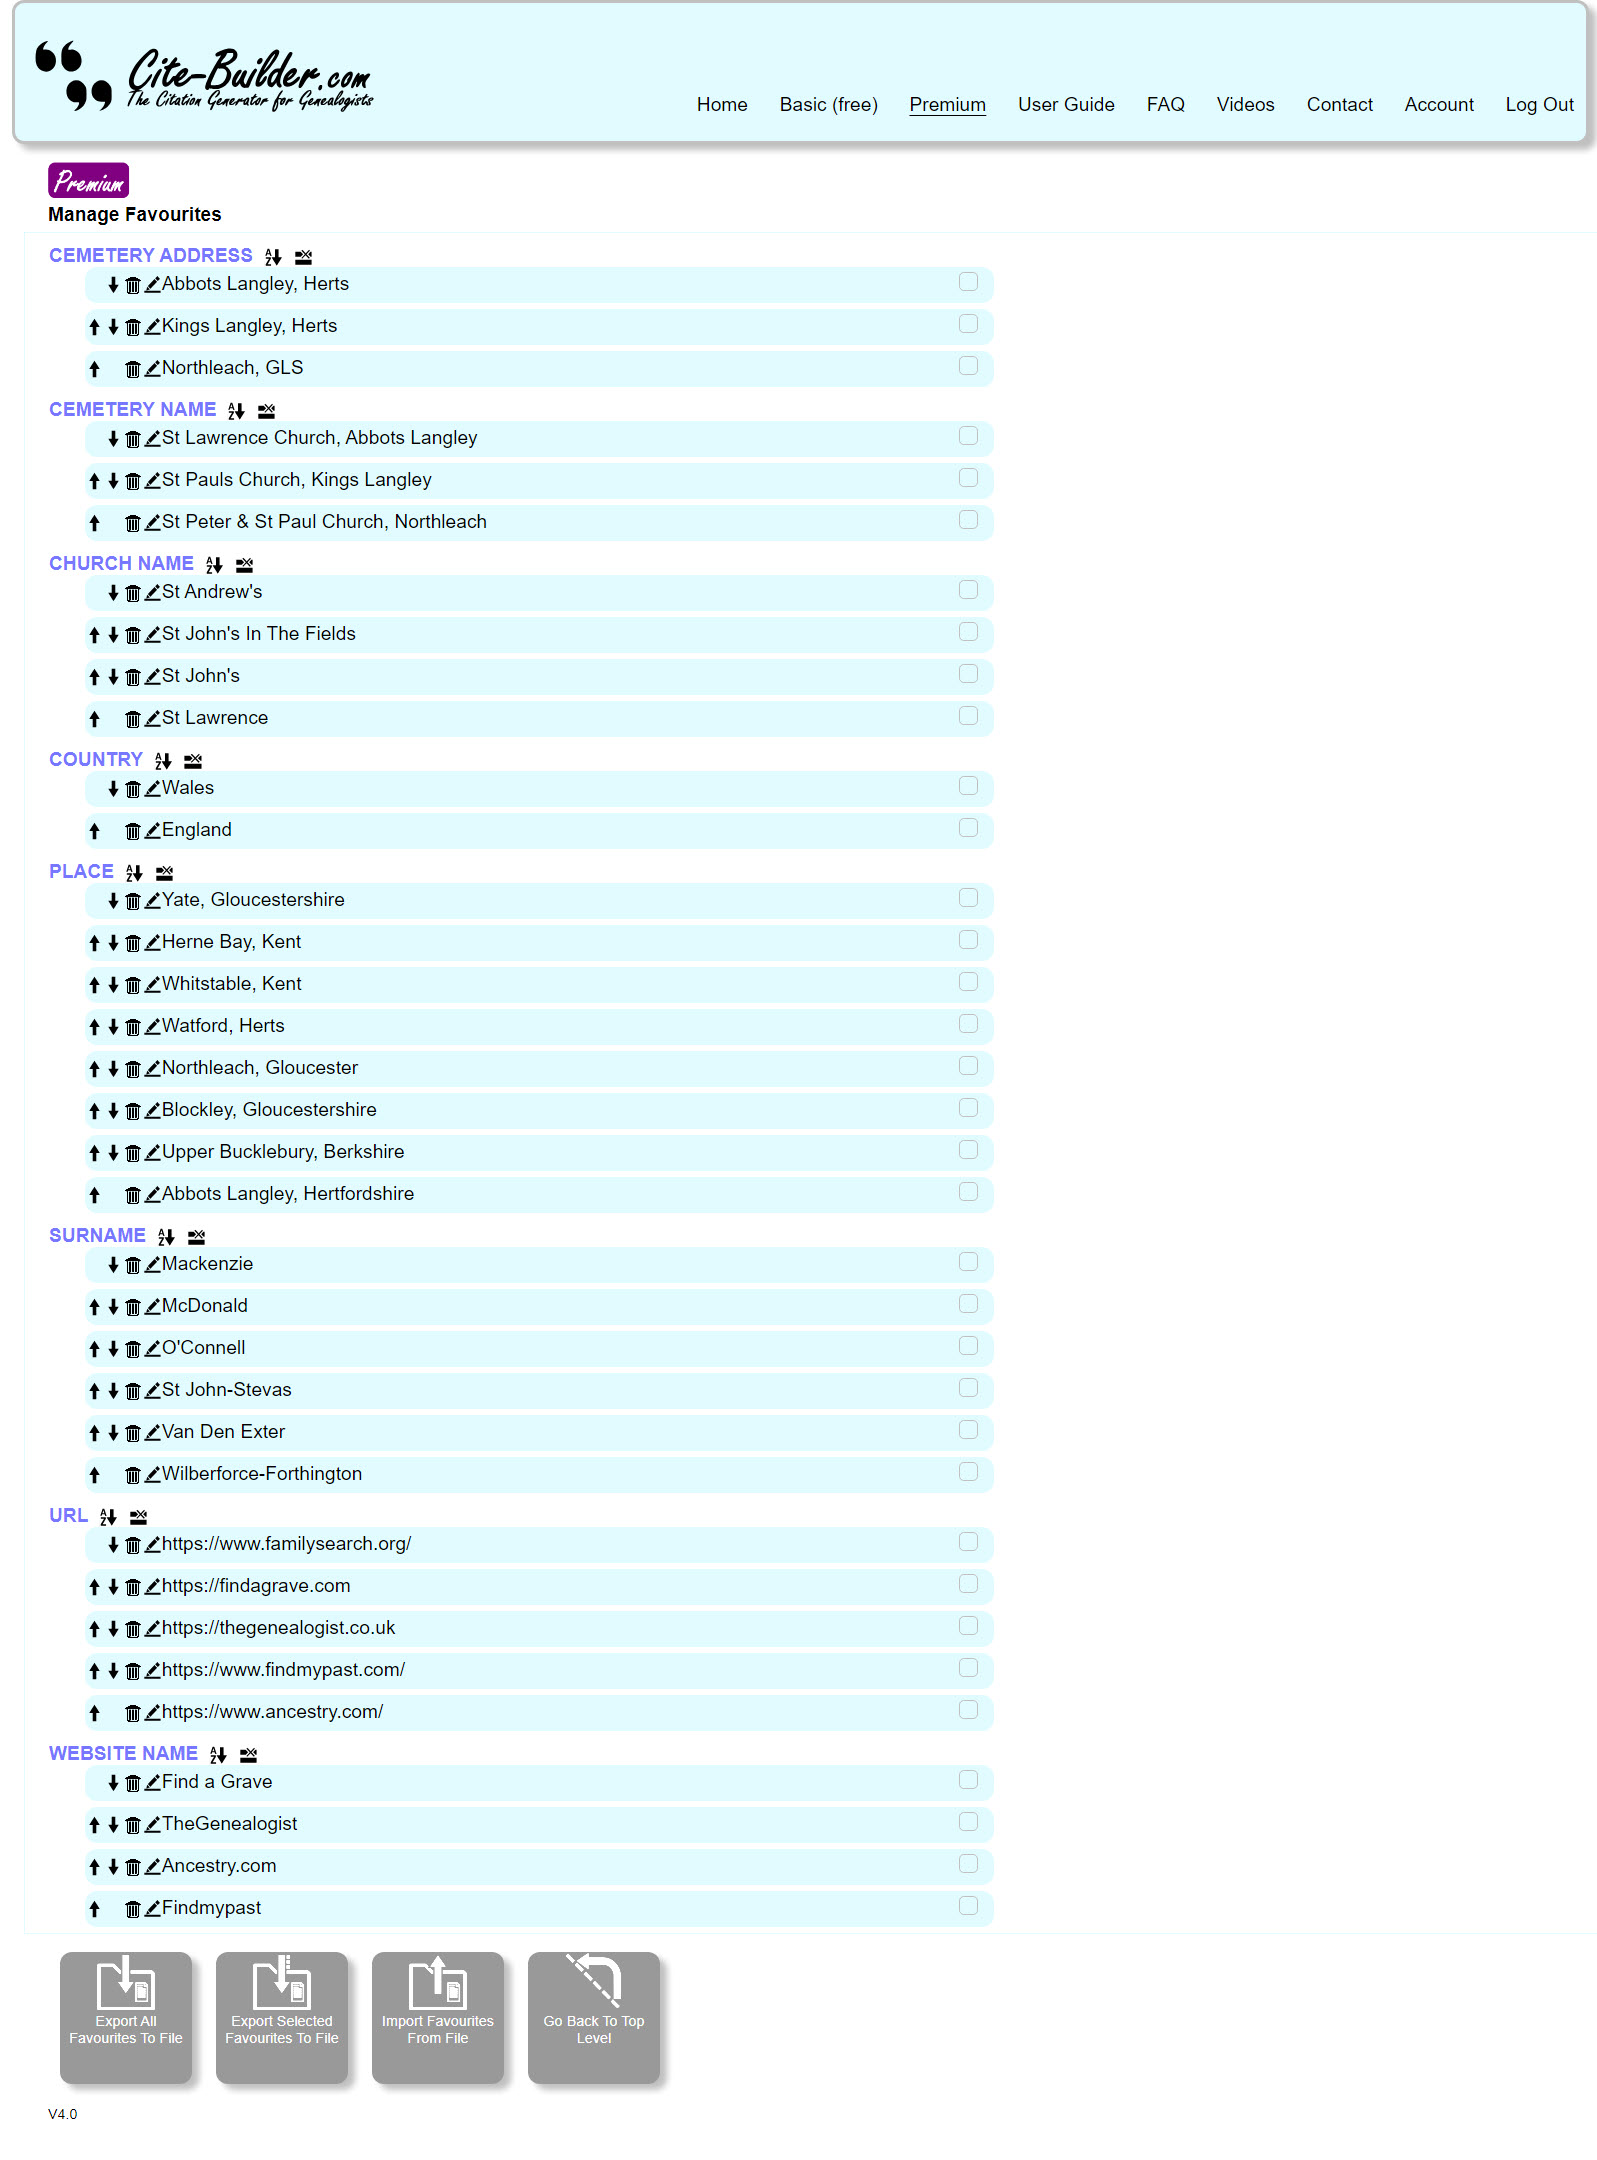
Important: Any changes you make from this page are saved immediately. If you intend to do a lot of changes, we recommend that you first export your Favourites to a file as a backup in case you need to go back.
Re-ordering your Favourites
On the Manage Favourites page, your Favourites are grouped by the field name that they are associated with, and then within each group their order may vary. By default, the most recently stored Favourite appears at the top of each group, so that it is at the top of the drop-down list when you are recalling Favourites.
To change the order within each group, click the Up and Down arrow icons
next to each Favourite listed.
Time-saving tip: To move a Favourite straight to the top of the group, hold the SHIFT key as you click the Up-arrow icon. To move a Favourite straight to the end of the group, hold the SHIFT key as you click the Down arrow icon.
Bonus Time-saving Tip: You may find that having all the Favourites for a particular field stored, and displayed, in alphabetical order. Click the AZ sort icon
![]() next to the field name to sort all the Favourites for that field from A to Z.
next to the field name to sort all the Favourites for that field from A to Z.
Editing or renaming a Favourite
To edit a Favourite, (which is the same as renaming it), click the Pen icon
![]() next to the Favourite.
next to the Favourite.
This will open up a form, where you can make changes to the value stored as a Favourite.

After making your changes, click the grey Save button or, to abandon your changes, click the Cancel button.
Deleting a Favourite
Over time you will likely build up a large number of Favourites and may want to have
a clear-out! To delete an unwanted Favourite, click the Bin icon
![]() next to it.
next to it.
This will display a prompt, asking you confirm to delete the Favourite.

If you click the Delete button, the Favourite is deleted. You cannot directly undo this, although you can restore the Favourite by importing it from a backup copy of your Favourites that you have exported previously.
Time-saving tip: From the Manage Favourites page, you can delete a Favourite with no additional prompting by holding the SHIFT key as you click the Bin icon. This is useful if you have a number of Favourites to delete, but be careful as there is no undo ! Ensure you have exported your Favourites as a backup before doing this.
Removing Duplicate Favourites
You may find you have stored some duplicate Favourites. You can either manually delete the duplicates, using the Delete button as described earlier. Or, you can click the Remove Duplicates
![]() button next to each field name.
button next to each field name.
Exporting Favourites to a file
To export all of your Favourites to a file, from the Manage Favourites page click the Export All Favourites To File button.


You’ll be asked to confirm the export, or to cancel.
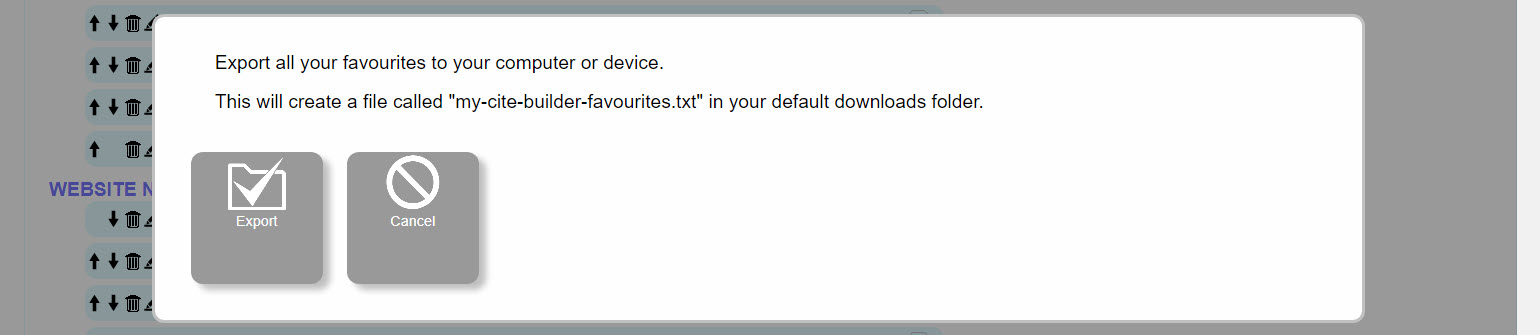
To confirm, click the Export button. The Favourites are exported to a file called “my-cite-builder-favourites.txt” in your default downloads folder. If you already have a file with that name in that folder, then a version number is appended to the filename.
If you wish to export only selected Favourites to a file, then first select the Favourites to export by clicking the checkbox next to each Favourite as shown in the example below:
Next, click the Export Selected Favourites To File button.
You’ll be asked to confirm the export the selected Favourites, or to cancel.
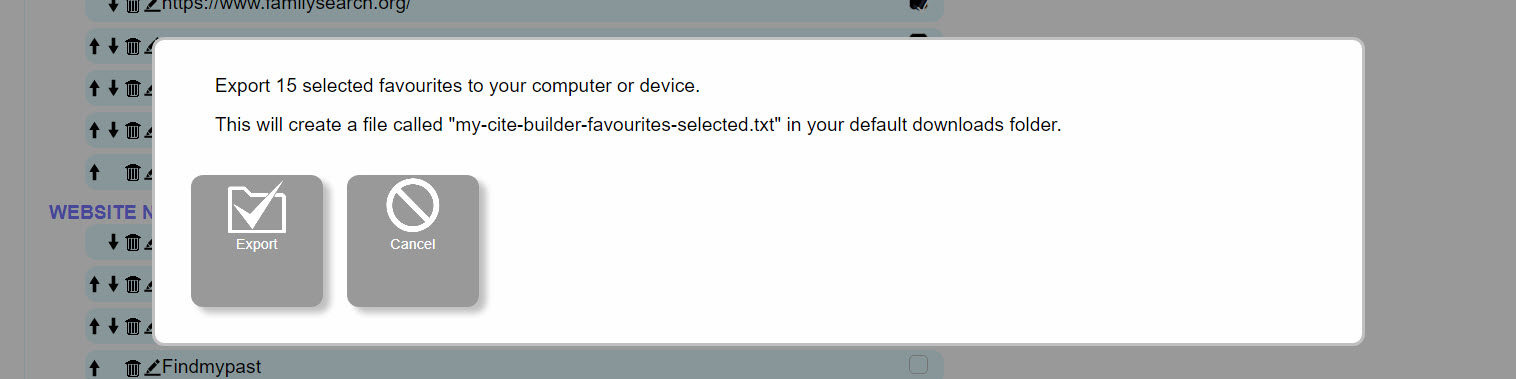
To confirm, click the Export button. The Favourites are exported to a file called "my-cite-builder-favourites-selected.txt" in your default downloads folder. If you already have a file with that name in that folder, then a version number is appended to the filename.
Importing Favourites
To import Favourites, either from a backup you made by exporting, or from a Favourite export file that someone shared with you, click the Import Favourites From File button on the Manage Favourites Page.

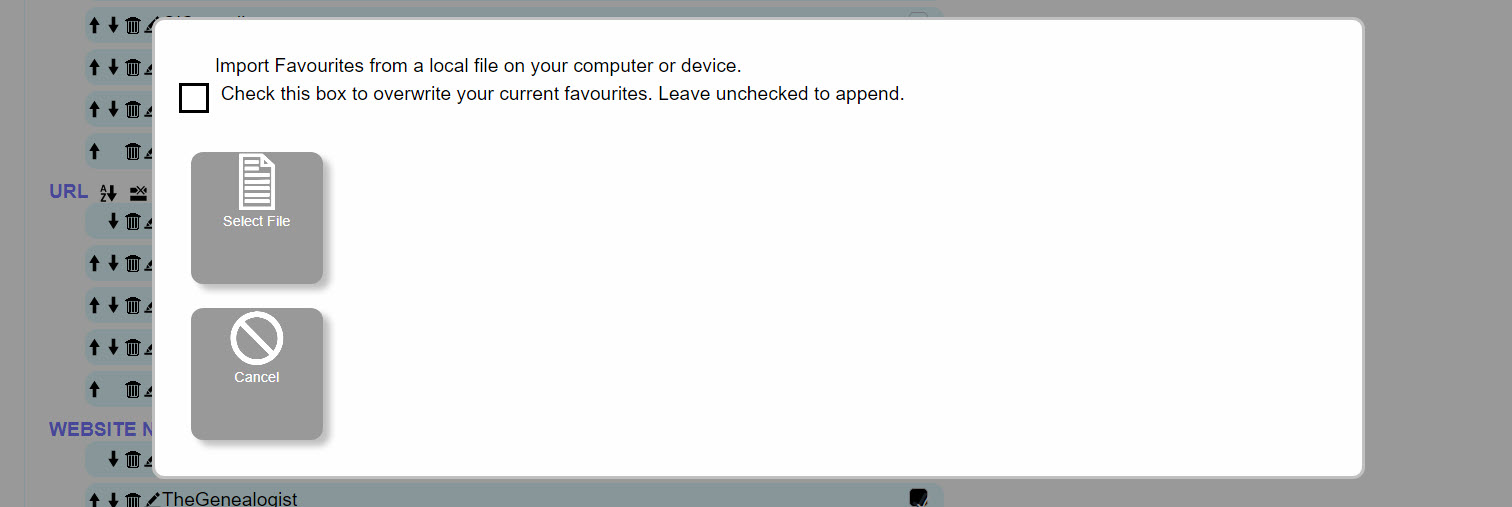
You will be prompted to select the file you want to import, or to cancel. Also, note there is a checkbox for you to tick if you want the import to completely overwrite your existing Favourites. If you leave this unchecked, the imported Favourites will be appended to your existing Favourites.
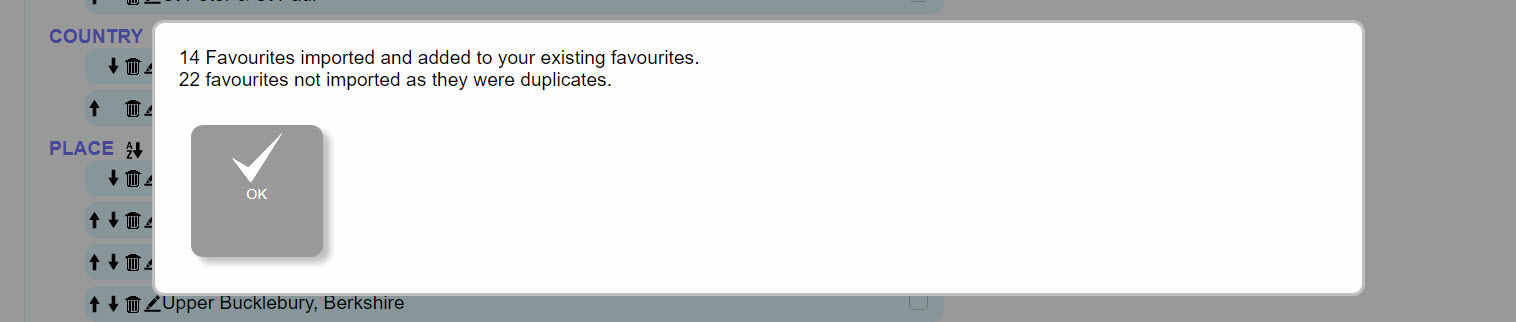
Once you have selected a file, the Favourites it contains are imported, excluding any duplicates.
The imported Favourites will appear at the end of your Favourite groups but you can reorder these as you need to. See Re-ordering your Favourites.
Important Note: The Favourite export functions create very specific and complex format files. You’ll note that they are text files, and so it may be tempting to edit them with a program like Notepad (on Windows) or TextEdit (IOS). We would caution against this as the Import function is very picky when it comes to the contents and format of these files; importing a file that you have edited is likely to have unpredictable results!
Pins (Premium feature)
You can “pin” Template Groups and/or Templates to the top of the page that they appear, making it easier to find them quickly. Just SHIFT-click on a Template Group/Template to pin it. To “unpin”, just SHIFT-Click again.
Citation History (Premium feature)
As you create citations, Cite-Builder keeps a record (starting 1st January 2026), and you can go back and view these citations if you need to. You can copy and paste the citations again, if needed. You can even open the related Template again and make adjustments to the citation to create a new version of that citation.
Viewing your Citation History
To view your Citation History, click either the View Citation History button in the sidebar or in the lower toolbar. Note these buttons are not displayed on every screen.


Your citation history will be displayed, most recent first, as shown in the example below. As shown, citations created from both Templates and Personal Templates are shown, differentiated by the icon colour.
If all you want to do is copy the citation as it stands, then simply click on the grey “Copy To Clipboard” button to the right of the particular format of the citation that you want to copy.
If you want to make changes to the citation, then you will need to open the history item.

Opening a History Item
To open a history item, click on the coloured icon to the left of the history item date and time. This opens the underlying Template with which the citation was created, and populates the Template with the stored data you used to create the citation. You can then make any changes you need to, including changing which style to use, and then click Build Citation. This new citation will be stored in your history too. Note you can also create a new Personal Template from this history item.

Deleting History Items
You may want to delete items out of your history. Most likely this will be if you had created creations with errors or missing values. We have saved these in your history regardless as we have no way of knowing if you might want to come back to revisit these later.
If you want to delete a single item from your history, simply click on the small delete button below the coloured icon.

You will be prompted to confirm that you want to delete this history item. Click OK to proceed, or cancel. NOTE: There is no “undo” button!

Time Saving Tip: Hold SHIFT when you click the Delete icon and the history item is deleted with no confirmation prompt. But remember, there is no UNDO! However, this shortcut is useful if you have a number of items to delete.
If you want to delete all history items from oldest up to and including a particular one, hold the ALT key (or Option key on a Mac) while clicking the delete button next to that history item. This displays a prompt to confirm that you want to delete all those history items, and reminds you that there is no UNDO! Click Ok to proceed or click Cancel.
